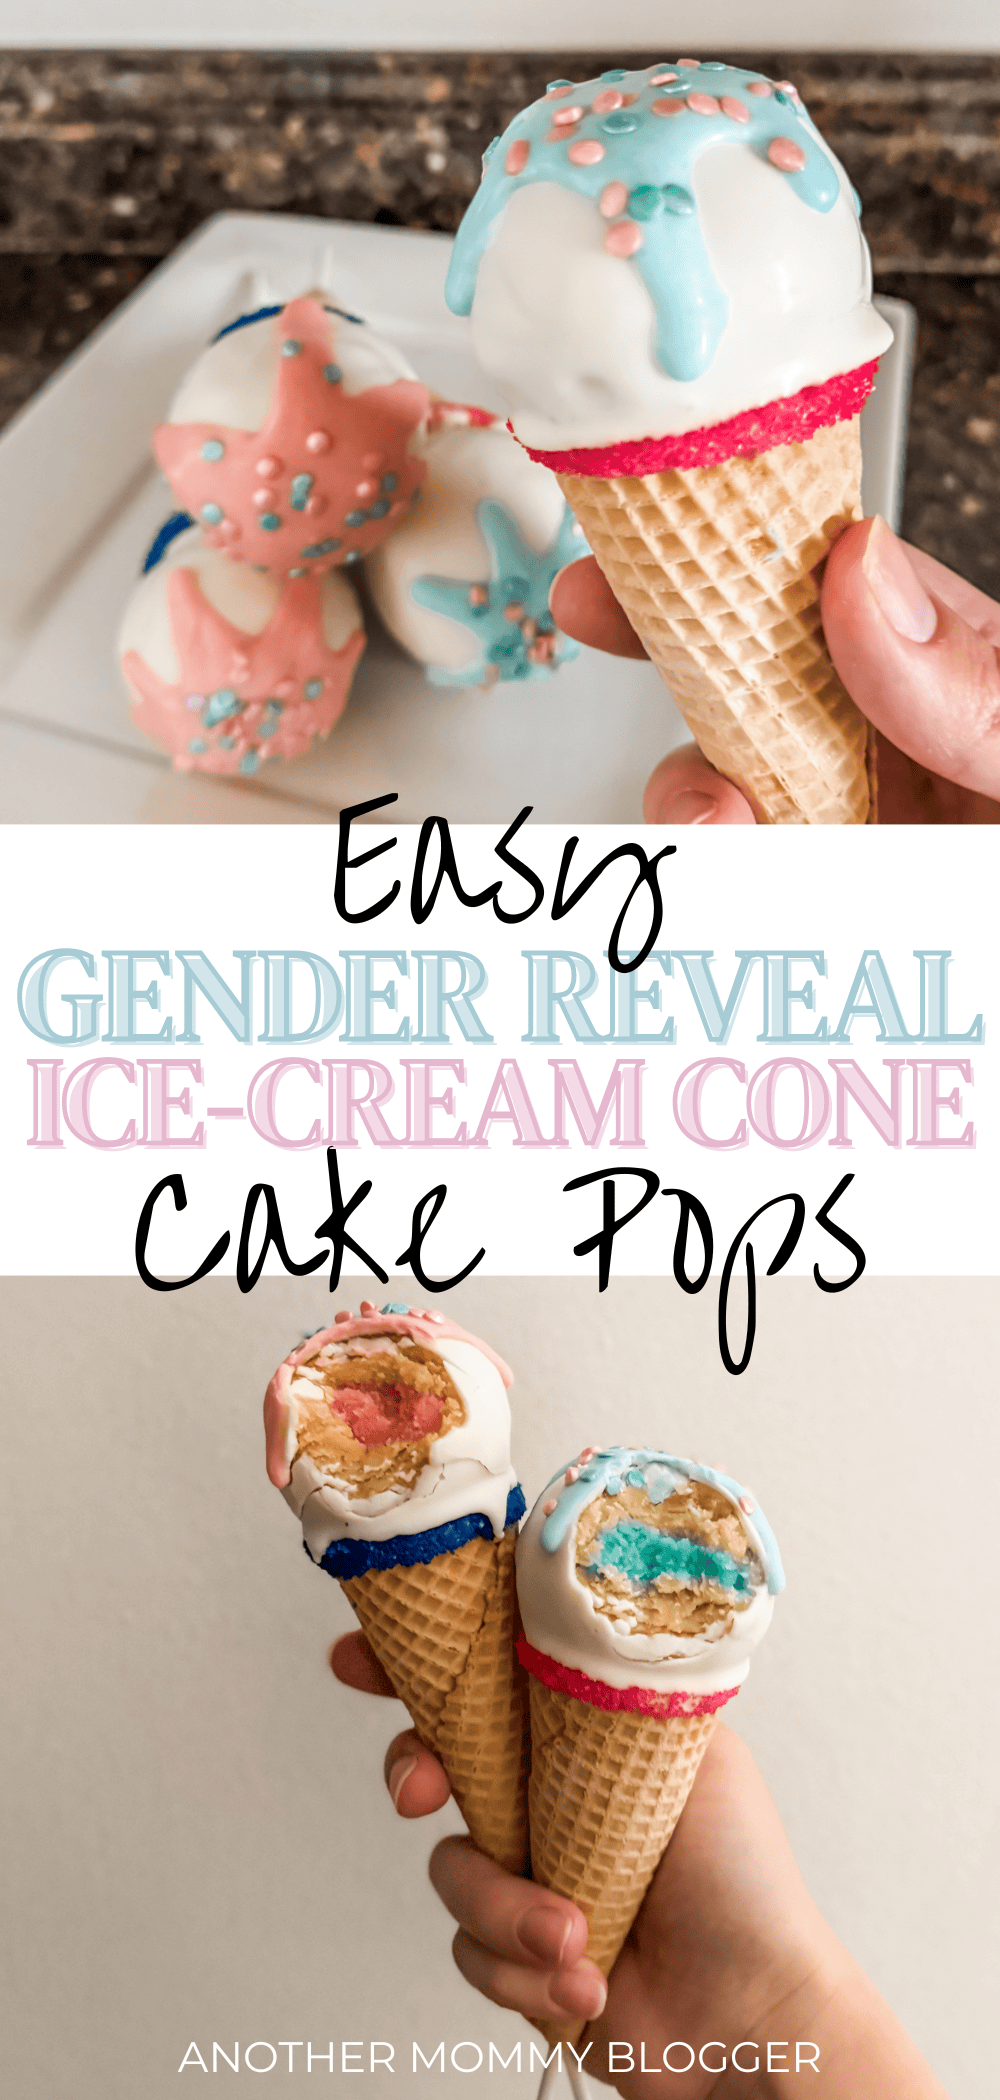
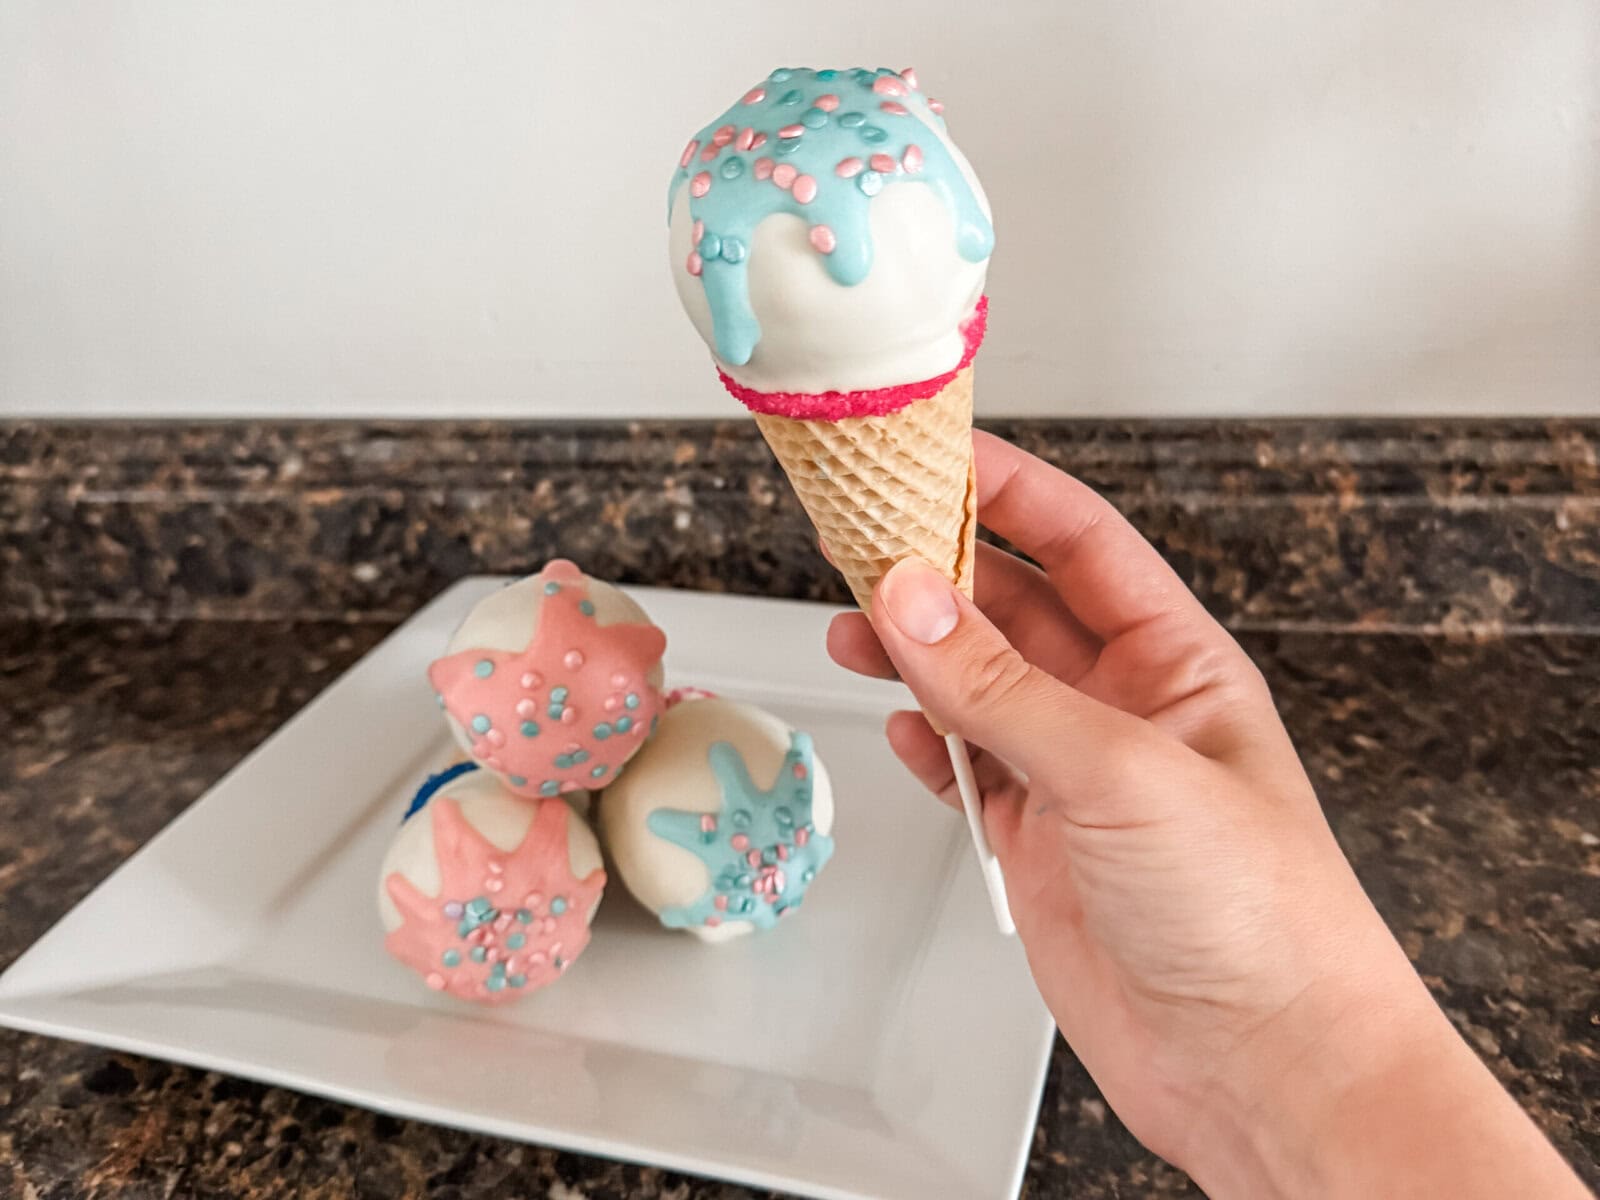
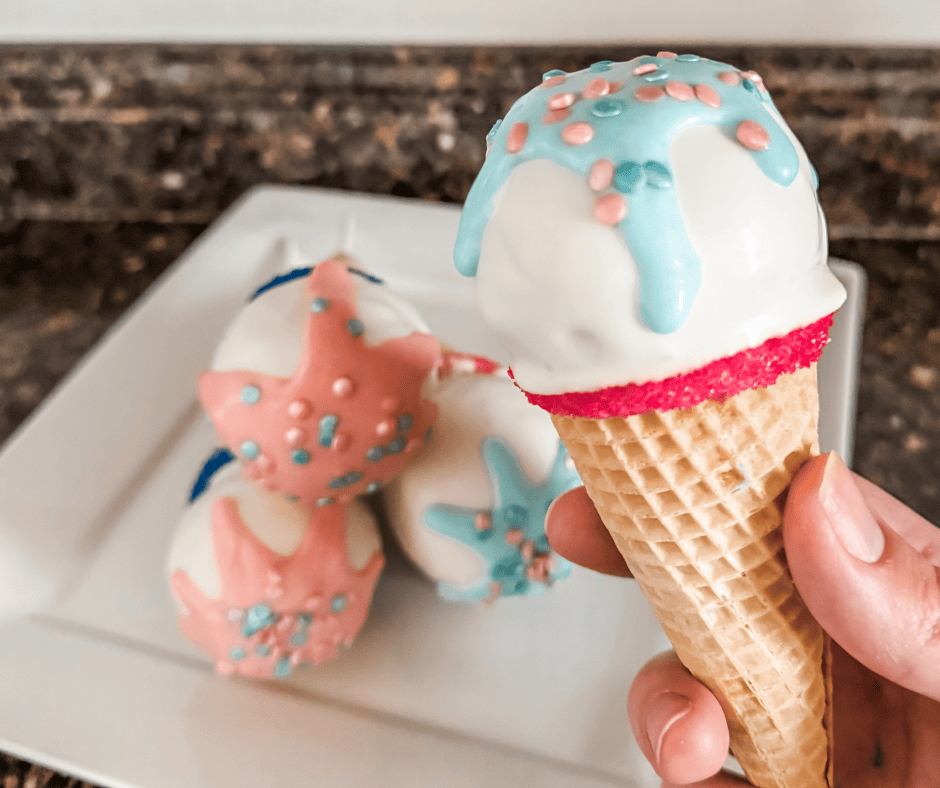
If you’re looking for a sweet and simple way to announce your baby’s gender this summer, I’ve got you covered. These ice-cream cone gender reveal cake pops are adorable, fun to make, and honestly—a total crowd pleaser.
I had so much fun making these for the blog. They’re perfect for a gender reveal party to surprise family and friends with something a little extra cute.
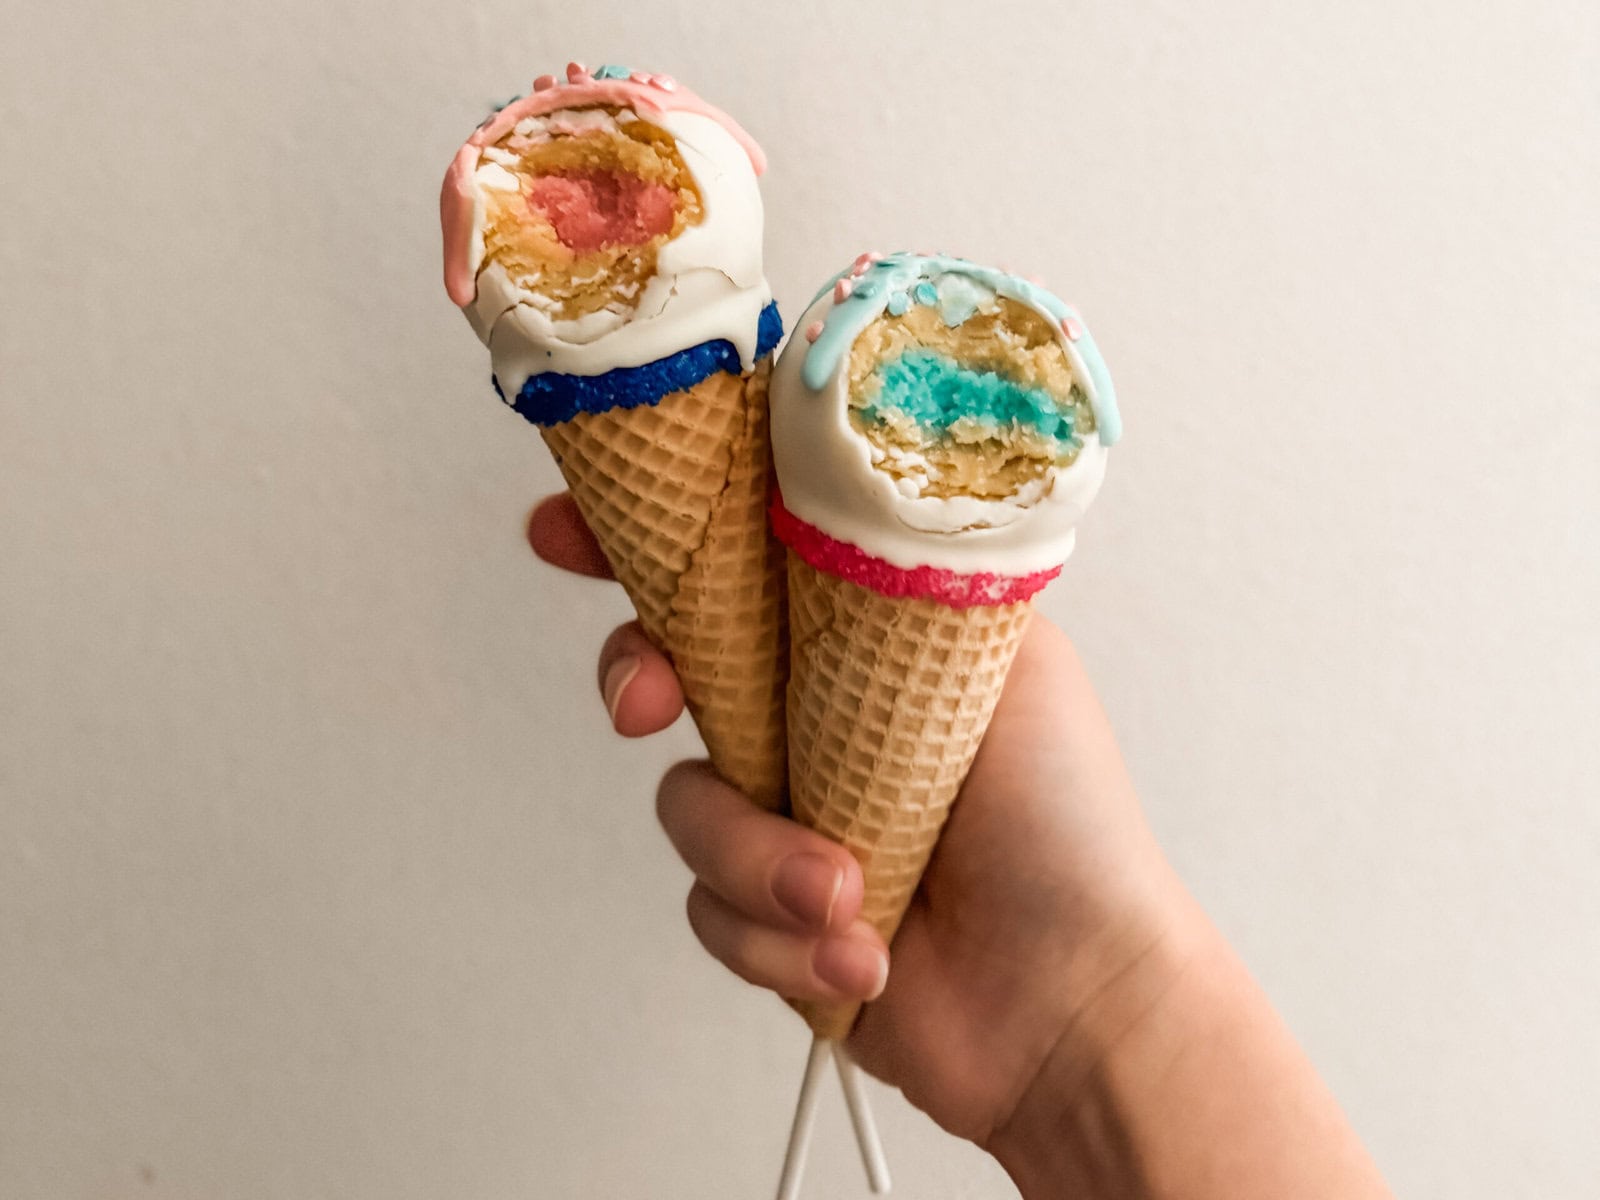
The inside reveals either pink or blue cake, so you get that exciting moment when everyone bites in to see “what it’s gonna be!”
Plus… they look like tiny ice-cream cones. I mean, come on.
I made sure to keep this tutorial easy to follow, and I’ll walk you through step-by-step so you can make them too. Whether you’re team pink, team blue, or keeping it a surprise until bite time.
This post contains affiliate links. For more information, please read my disclosure here.
📌 Love these baby photo ideas? Save this pin for later!
What You’ll Need
Ingredients:
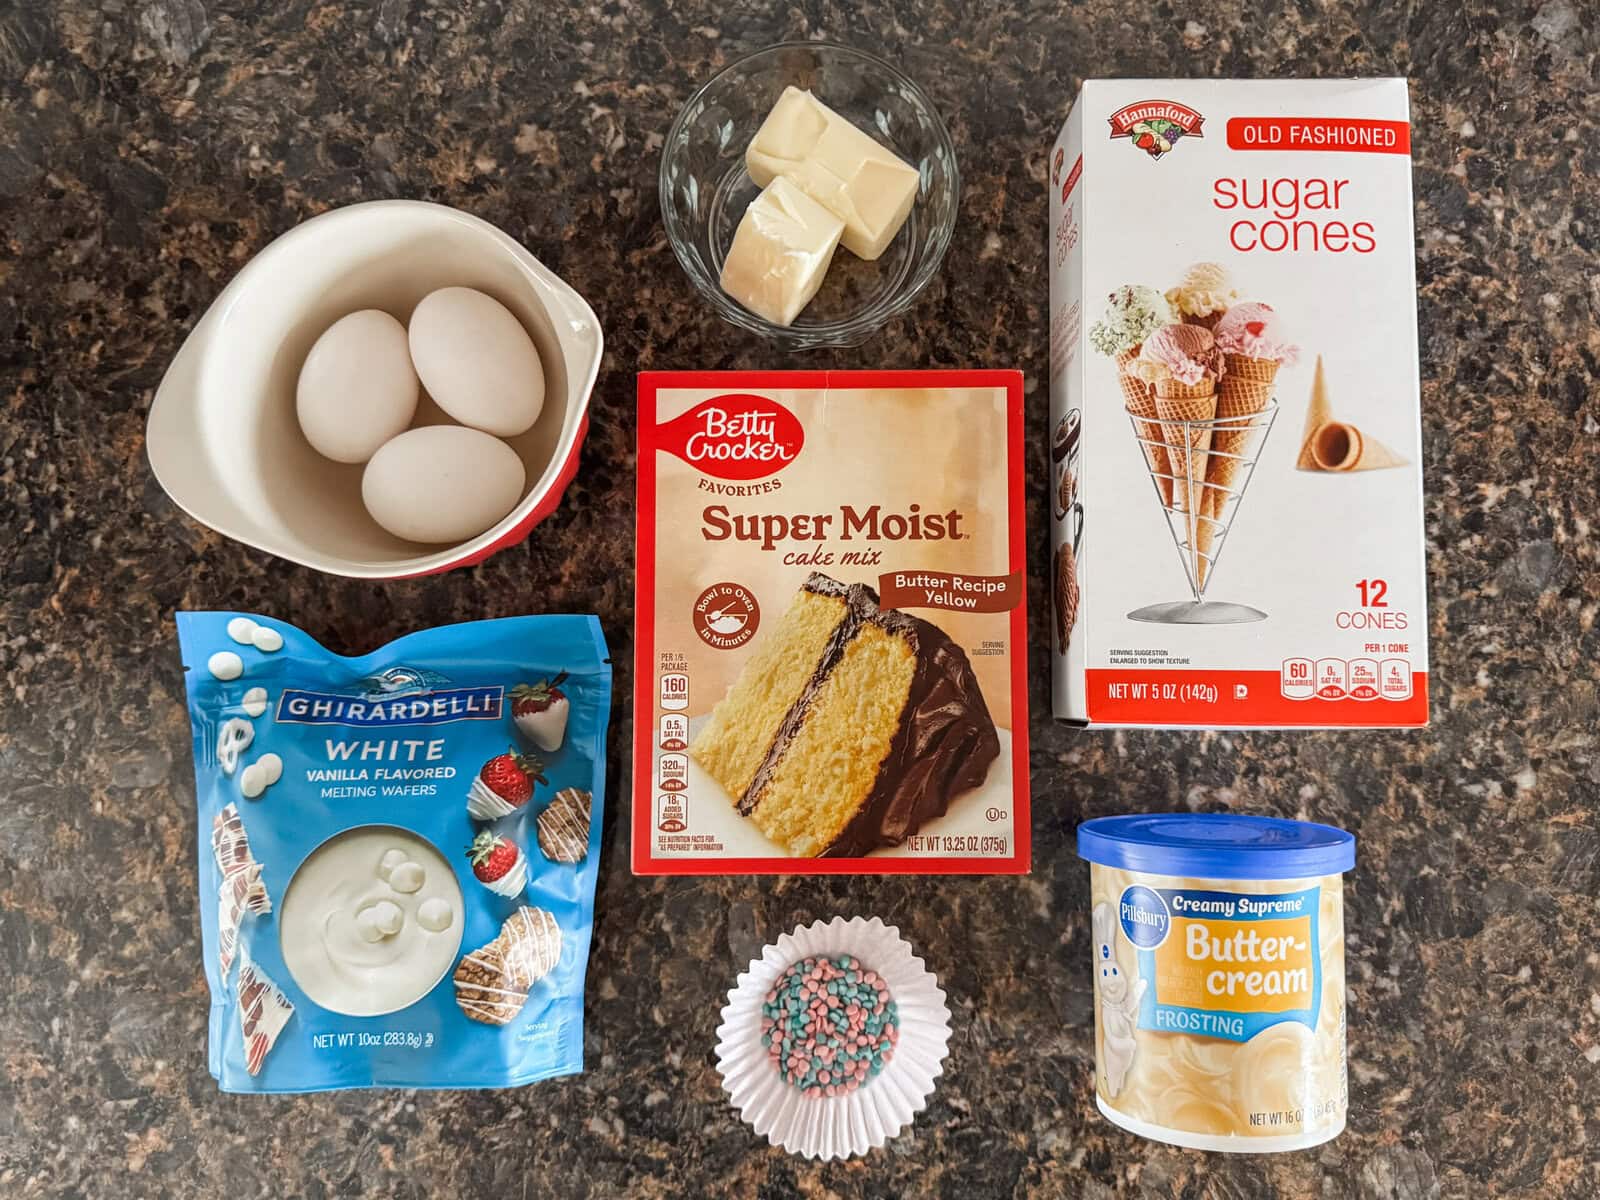
- (2) 15oz box cake mix (split into 3 batches)
- eggs, water, butter (or vegetable oil, follow box instructions)
- Pink and blue food coloring
- Vanilla or cream cheese frosting
- White melting wafers
- Sugar cones
- Pink and blue sprinkles
Tools:
- Hand mixer or stand mixer
- Baking sheets + parchment paper
- Mixing bowls
- Cookie scoop or spoon
- Microwave-safe bowl for melting chocolate
- Squeeze bottle for drizzle
- Cake pop stand
- Cake pop sticks
Step-by-Step Instructions
1. Bake your cakes
Start by baking two cakes: one full-size white cake in a 9×13 dish, and two smaller 6-inch rounds from your second box of mix. Add blue food coloring to one batch and pink to the other before baking. Let all the cakes cool completely before moving on.
💡 Note: I made both pink and blue centers so I could show you the full process no matter what team you’re on! But if you’re making these for an actual gender reveal, you’ll only need one colored cake — pink OR blue.
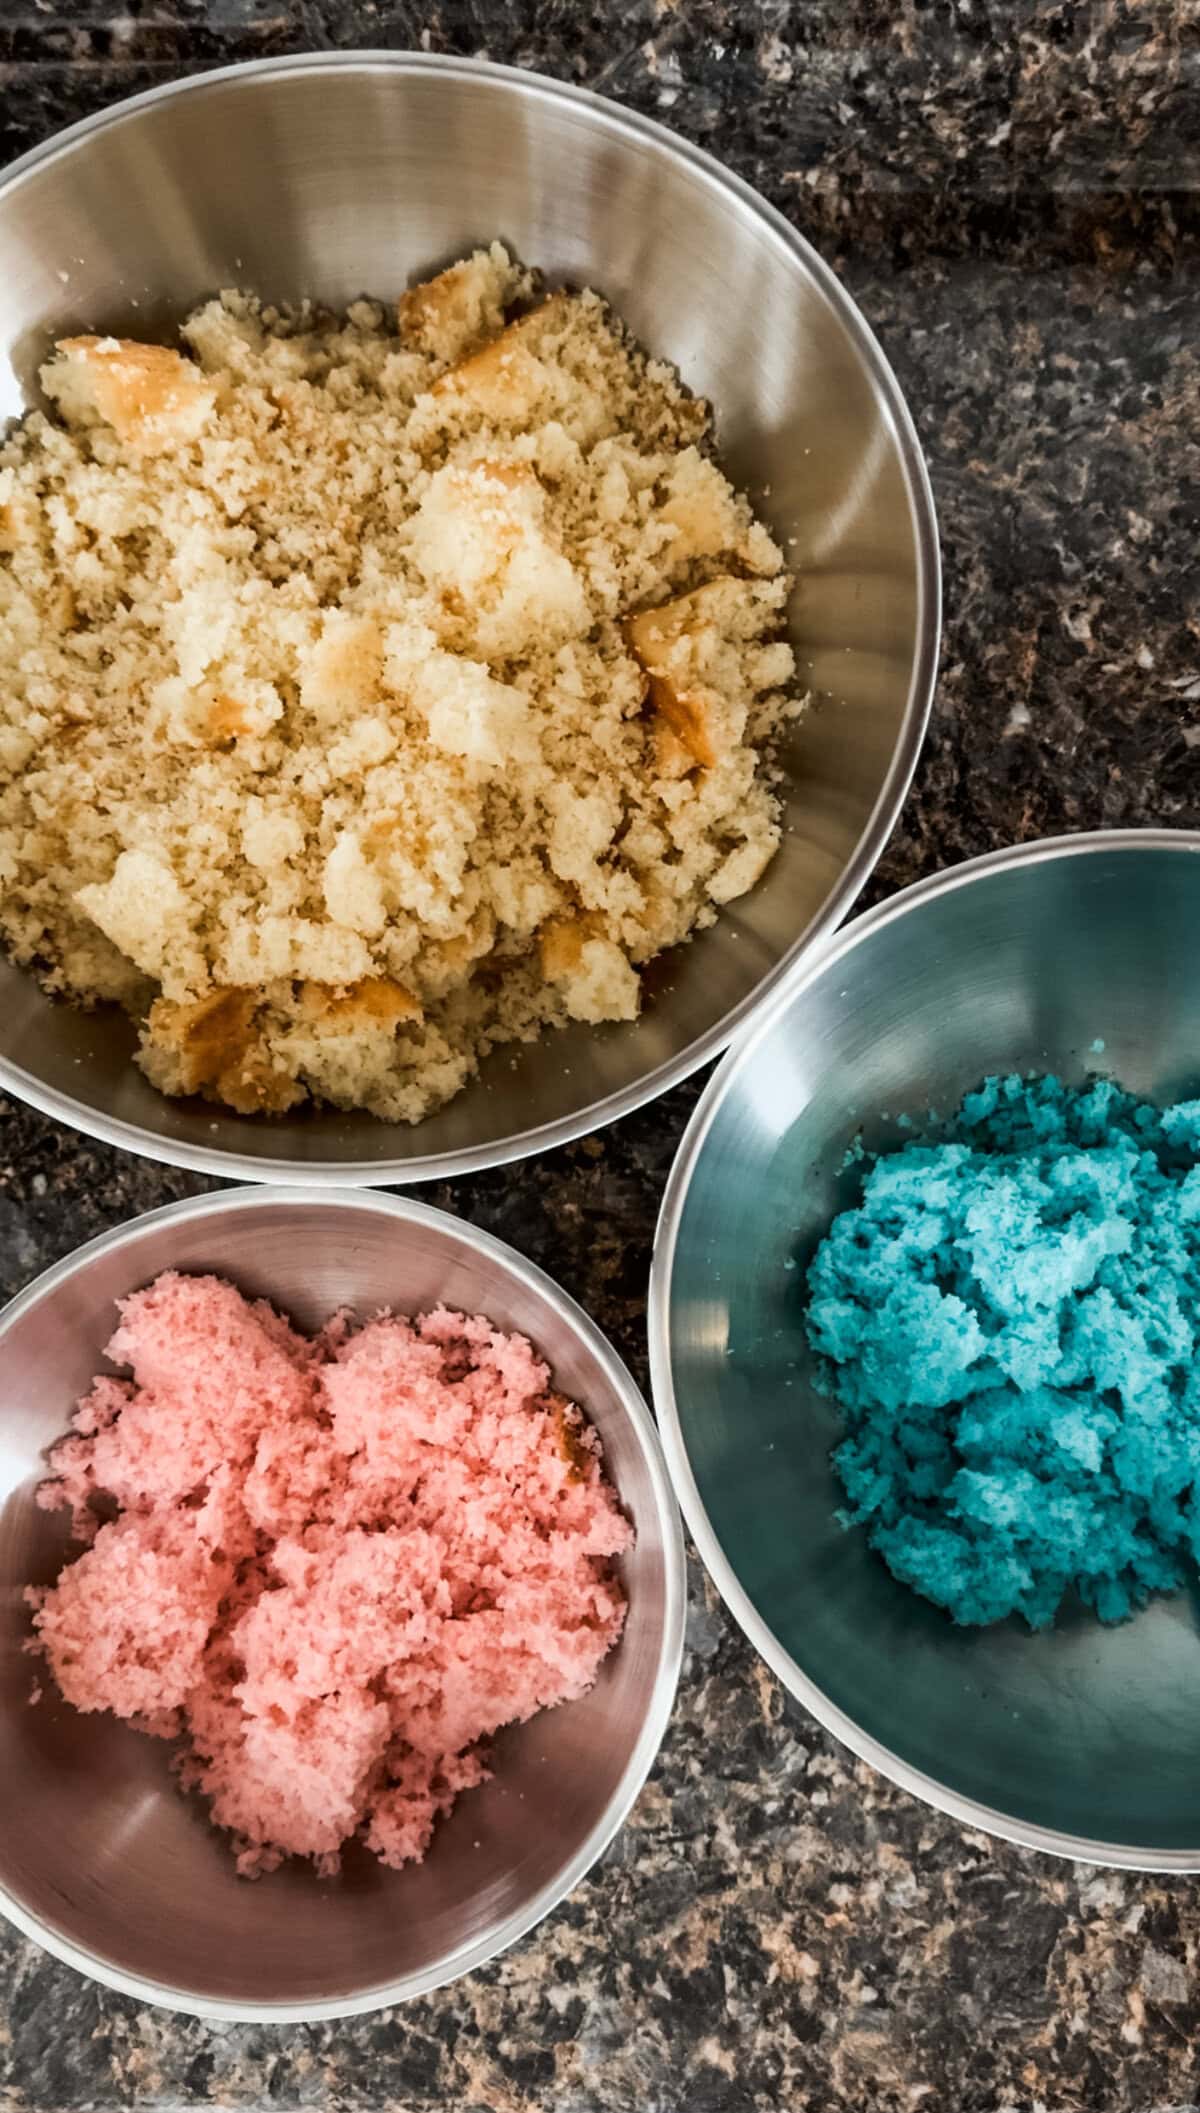
2. Crumble and mix with frosting
Once your cakes are cool, crumble each one into separate bowls. Start adding frosting just one tablespoon at a time — trust me, it’s easy to go overboard. You want just enough frosting to get the crumbs to hold together like dough, but not so much that it gets too soft and starts falling off the sticks. You need less than you would think.
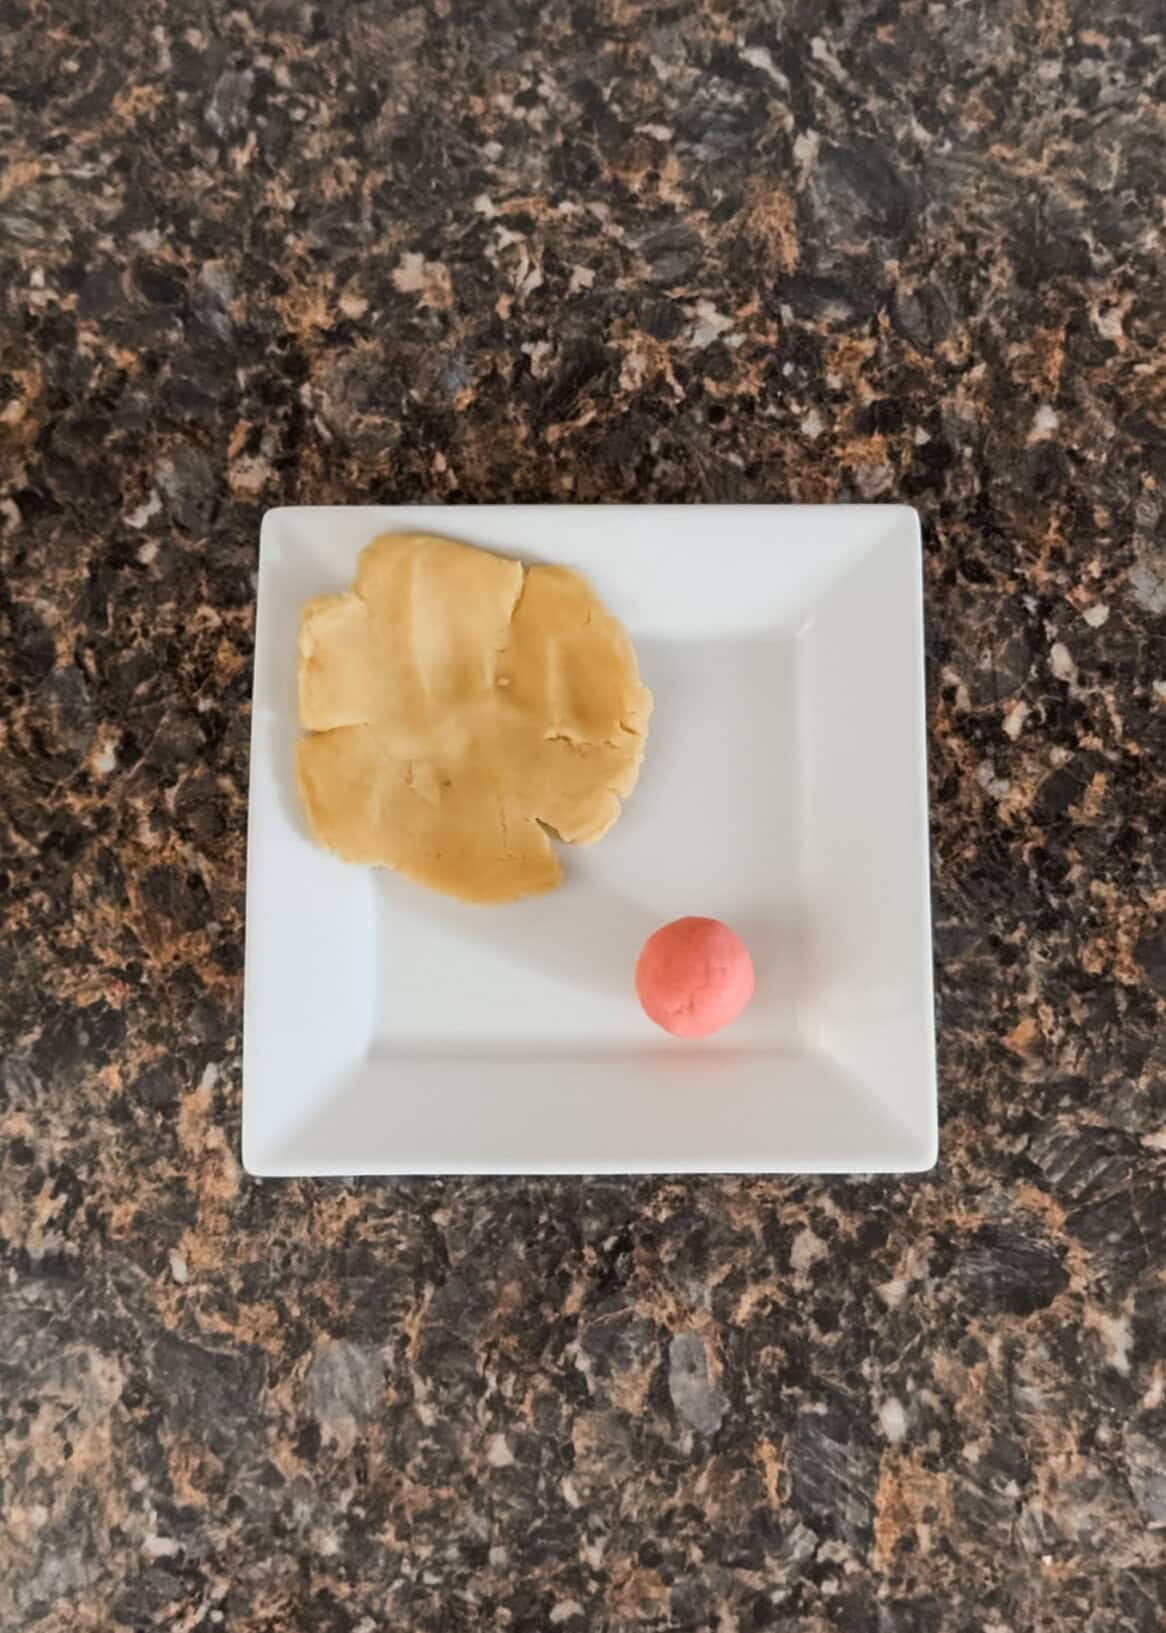
3. Make your cake balls
To get that cute surprise reveal, start with about 3 tablespoons of the white cake dough. Flatten it out in your hand. Then roll a 2 tablespoon-sized ball of either pink or blue cake and place it in the center. Wrap the white cake dough around the colored center and roll it between your hands to smooth it out and remove any bumps.
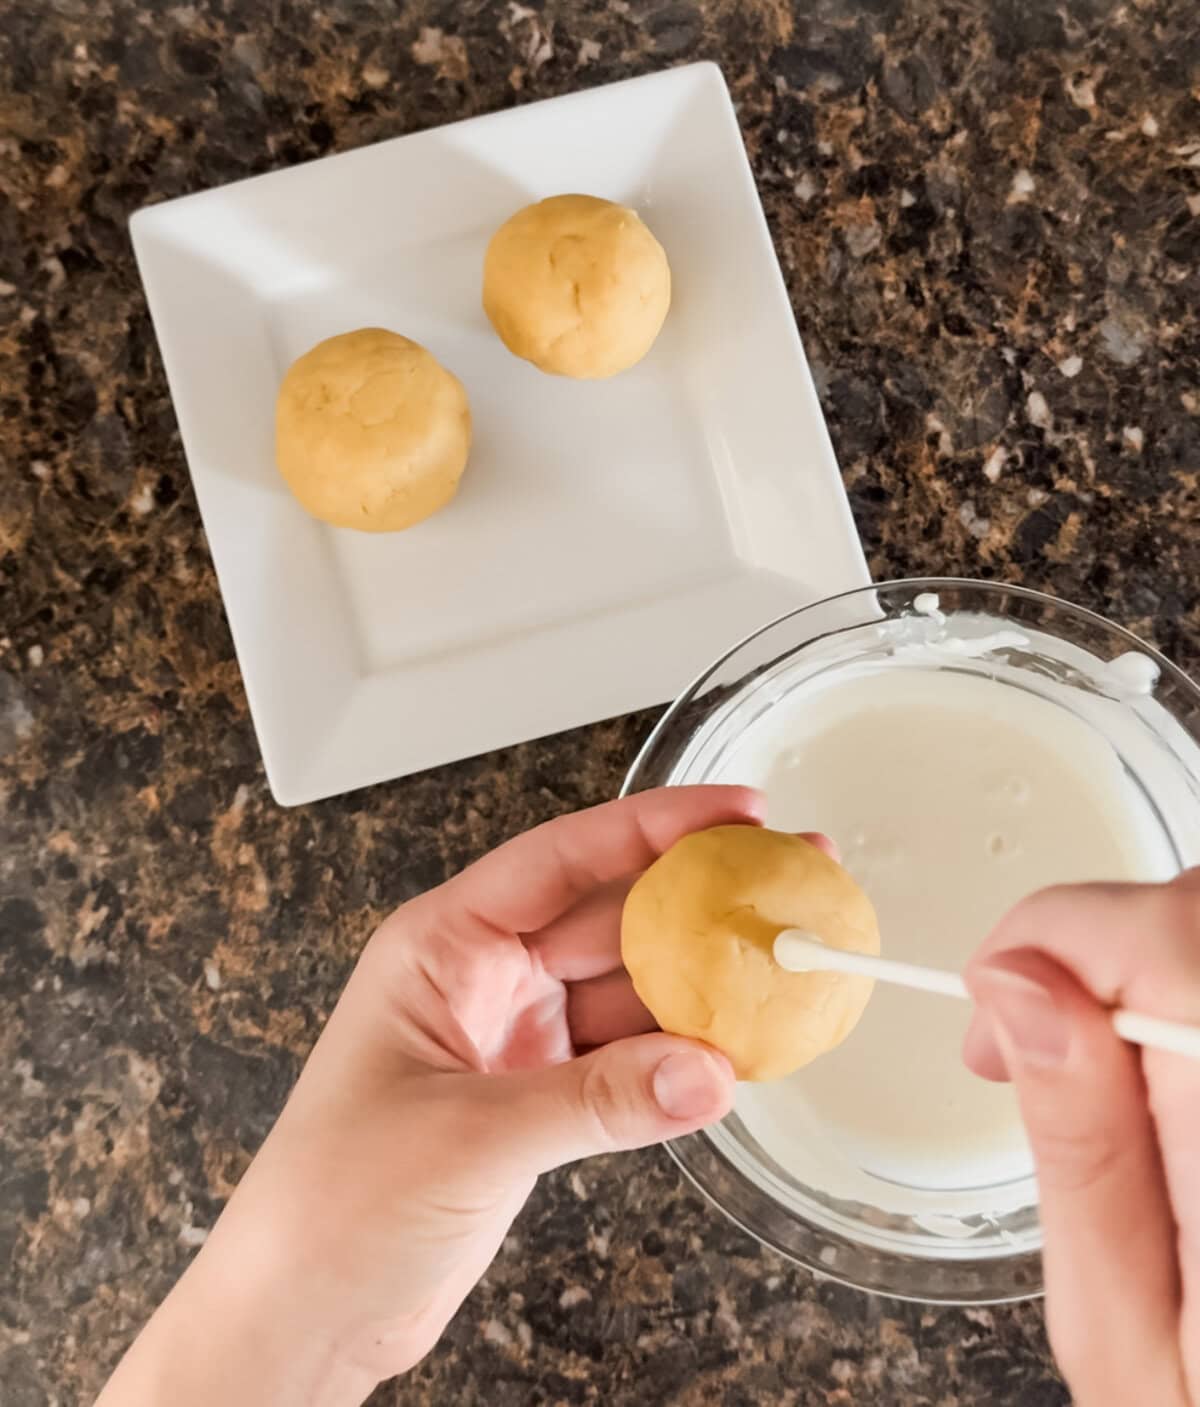
4. Insert sticks and chill
Melt your white chocolate wafers in a microwave-safe bowl in 25-second bursts, stirring in between. Dip one end of a cake pop stick into the melted chocolate and then insert it a little more than halfway into the center of the cake ball. Set all the cake pops on a tray and pop them in the fridge for 30 minutes to firm up.
5. Decorate your cones
While the cake pops are chilling, grab a baking sheet and line it with parchment paper. Melt a little more white chocolate and dip just the edge of each sugar cone. Then dip the cone into a plate of sprinkles. Set them on the baking sheet and chill them in the fridge for 10 minutes to firm up.
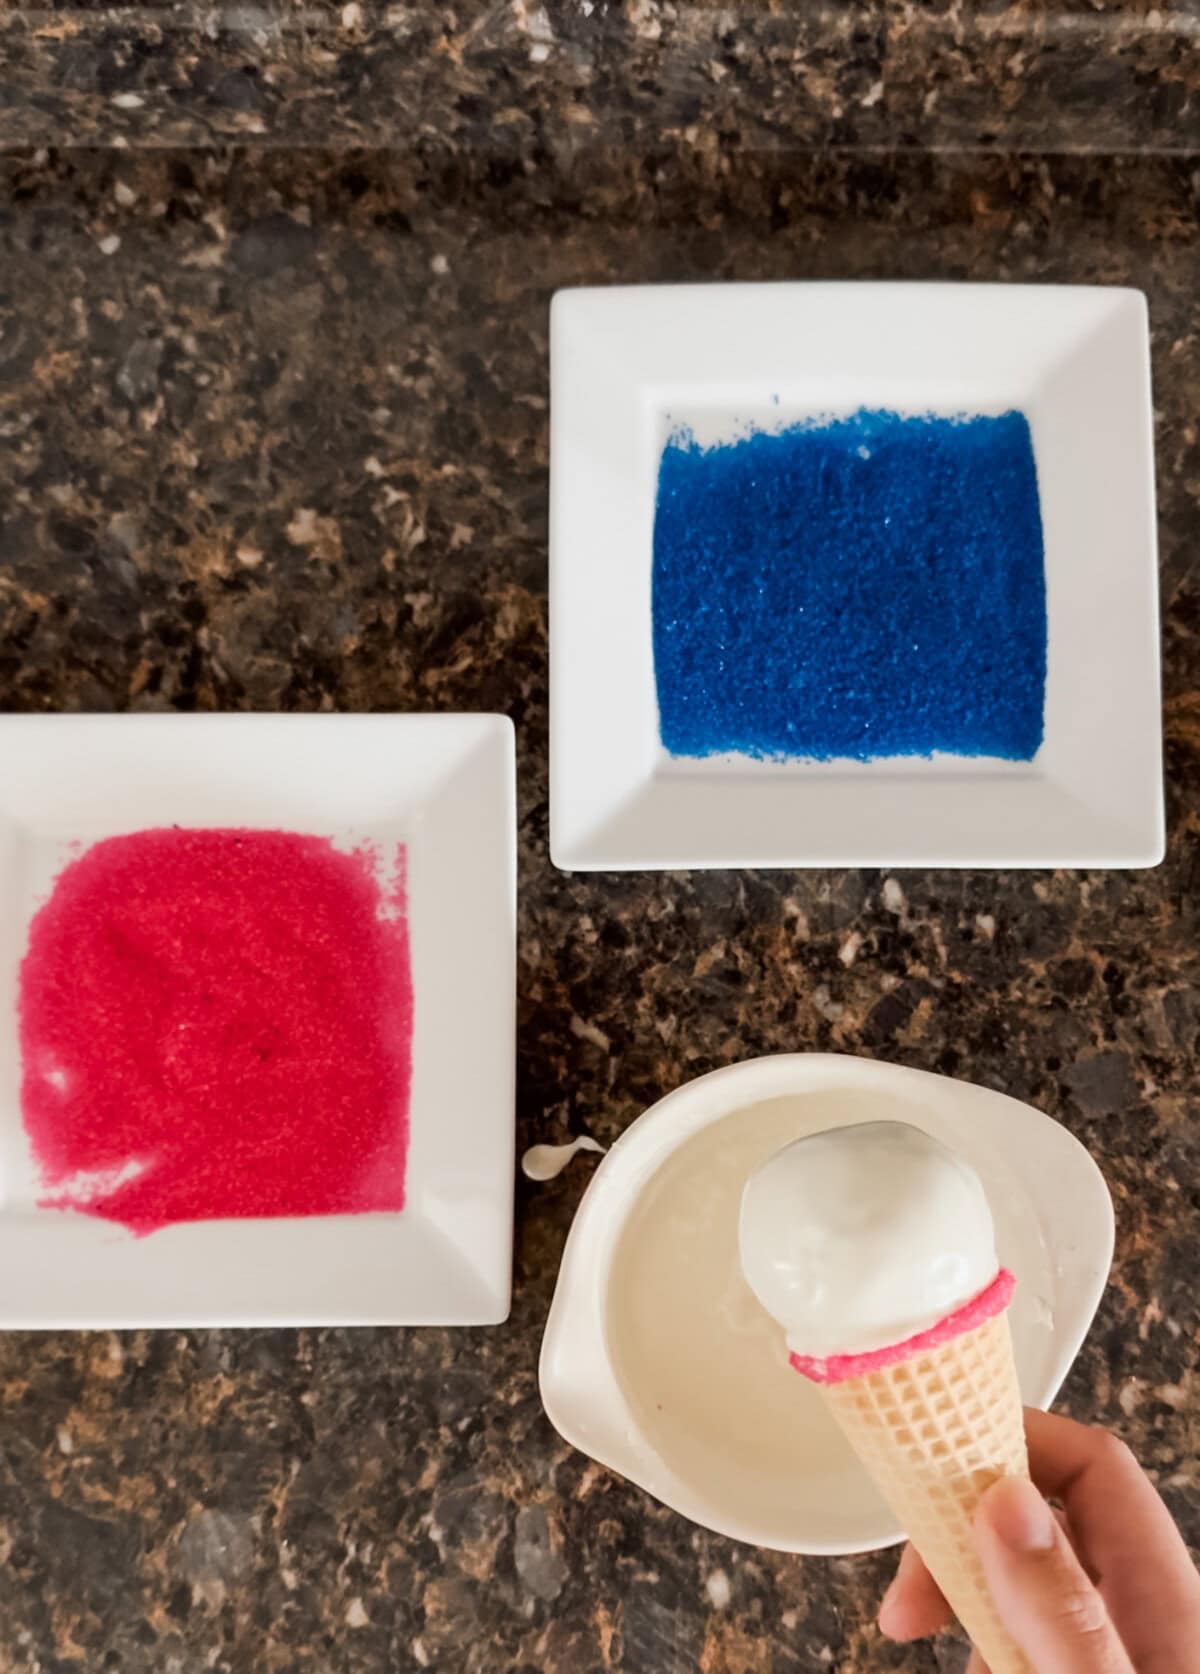
6. Dip and assemble
Take your cake pops out of the fridge and dip each one into the melted white chocolate. Gently tap off any excess. Then press the pop right into a sprinkle-covered sugar cone and place it upright in your cake pop stand. Let them sit until completely firm.
💡 Don’t wait for the chocolate to firm before pressing the cake pop into the cone — but don’t skip tapping off the excess either. You want just enough melted chocolate to slightly pool around the base, like a real scoop of melting ice cream. It helps everything stick and gives that cute, drippy effect. It might take a few tries to get the hang of it, especially if it’s your first time.
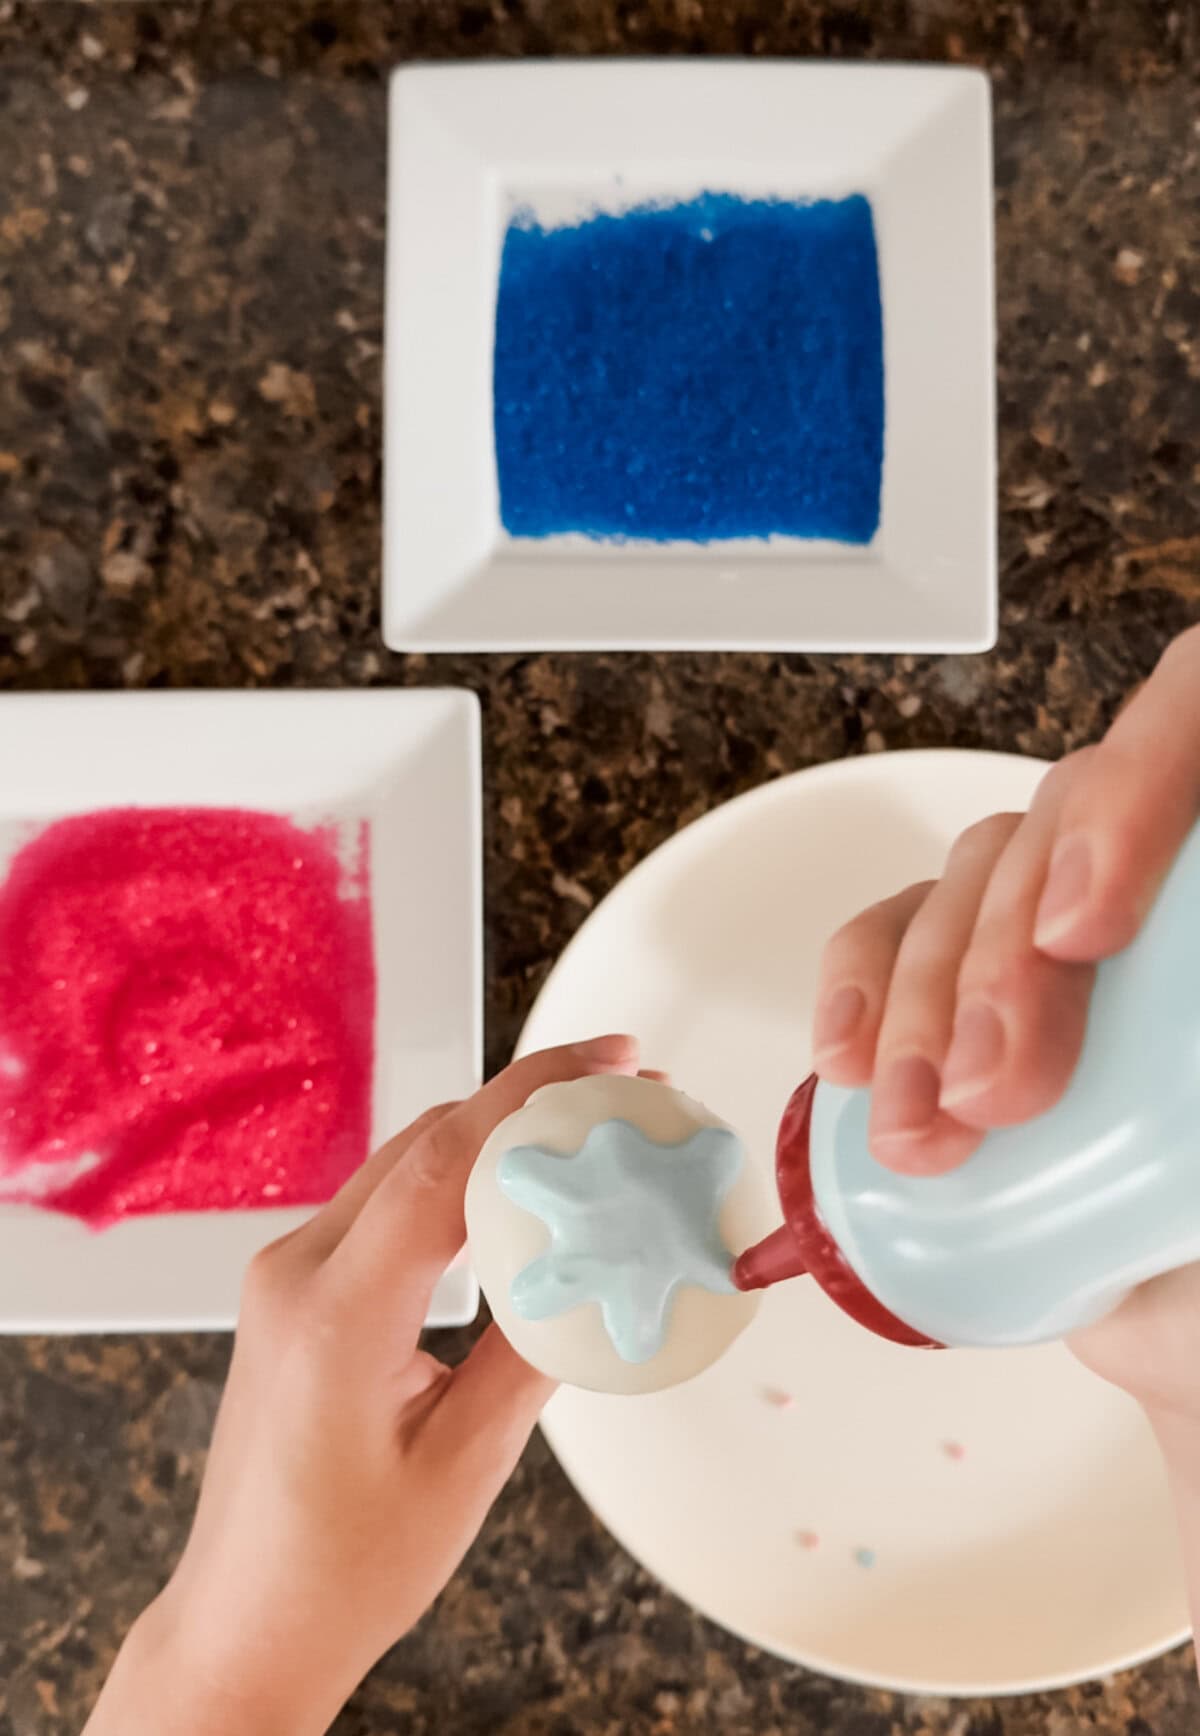
7. Add the drizzle
Divide your remaining melted white chocolate into two bowls. Add a drop of pink food coloring to one and blue to the other. Pour into squeeze bottles and drizzle the colorful chocolate over the top of each pop. While the drizzle is still wet, add a few extra sprinkles for that final touch.
Tips for Success
Don’t rush the chill time. When you’re making these ice-cream cone gender reveal cake pops, remember the cake balls really do need that time in the fridge to firm up. If they’re too soft when you dip, they can slide right off the stick or fall apart in the melted chocolate — and that’s just sad.
Add frosting slowly. It’s tempting to dump it in and mix, but seriously—start with just a tablespoon at a time. Once the dough holds together like playdough, you’re good.
Use a cookie scoop. It helps keep your cake pops consistent in size, which makes them look neater and also helps them fit nicely in the cones.
Prep your cones while you wait. Use that chill time wisely and get your cones decorated and ready to go. It makes the assembly go way smoother later.
Keep extra chocolate on hand. Between dipping, decorating, and drizzling, you’ll use more than you think. Better to have a little extra than to run out halfway through.
Get the kids involved! Sprinkling the cones or helping drizzle the pink and blue is a fun way to include them. Mine loved it — and it made the whole thing even sweeter.
Can You Make These Ahead of Time?
Absolutely! These gender reveal cake pops are super make-ahead friendly. You can prep the cake balls a day or two in advance and keep them in the fridge until you’re ready to dip and decorate.
You can also fully assemble them — drizzle, sprinkles, cones and all — and store them upright in the fridge for up to 3 days.
That said… let me tell you a quick story. This was actually my first time ever making cake pops, and I had them almost completely finished.
I’m talking just needed the drizzle and sprinkles on top — when the entire tray fell to the floor and broke. I just sat down next to them and put my head in my hands. I was crushed.
Thankfully I had some leftover dough and extra cones, so I started over the next day and finished them — carefully this time.
😅 So yes, if you’re working with a tight schedule or demanding toddlers, definitely make these ahead. Give yourself the breathing room and skip the last-minute stress (or heartbreak).
Printable Recipe Card
Ice-cream Cone Gender Reveal Cake Pops
Equipment
- Mixing bowls
- Mixer
- Baking sheet
- Parchment paper
- Cookie scoop
- Microwave safe bowl
- Squeeze bottle
- Cake pop sticks
- Cake pop stand
Ingredients
- (2) 15 oz Cake Mix
- Eggs, water, butter (as directed on cake mix)
- Pink and blue food coloring
- 3/4 or less cups vanilla frosting
- 12 Sugar cones
- 15 oz White melting wafers
- Pink and blue sprinkles
Instructions
- Bake Your Cakes: Prepare your cake mixes as directed. Bake one 9×13 white cake and two 6-inch rounds—one tinted pink, the other blue. Let them cool completely.
- Crumble and Mix: Crumble the cakes into three separate bowls. Add frosting to each, starting with 1 tablespoon at a time. Mix until the crumbs hold together like dough (do not over-frost).
- Form the Surprise Centers: Flatten 3 tablespoons of white cake dough in your hand. Roll 2 tablespoons of pink or blue dough into a ball and place in the center. Wrap the white dough around the colored ball and roll smooth.
- Insert Cake Pop Sticks: Melt some of the white chocolate wafers. Dip one end of each stick into the chocolate, then insert it into a cake ball. Place them on a tray and refrigerate for 30 minutes.
- Decorate the Cones: Melt more white chocolate. Dip the rim of each sugar cone in chocolate, then dip into pink or blue sprinkles. Set upright on a lined baking sheet and chill for 10 minutes.
- Dip and Assemble: Dip each chilled cake pop into melted white chocolate and gently tap off the excess. Immediately press into a sprinkle-covered cone. Set upright in a stand or glass and let them firm up.
- Drizzle and Decorate: Divide the remaining chocolate into two bowls and color with pink and blue food dye. Pour into squeeze bottles and drizzle over the tops. Add sprinkles before it sets.
Notes
- You can prep the cake balls ahead and chill overnight.
- The first time I made these I knocked them over and they all broke on the floor because I didn’t have a good cake pop stand so I definitely recommend one.
- Take your time coating your cake pops in the melting chocolate. You want enough excess to drip off so that when you insert into the cone it pools slightly but does not over flow and drip down.
Final Thoughts On Gender Reveal Cake Pops
If you’ve been searching for the cutest way to reveal your baby’s gender, these ice cream cone gender reveal cake pops check all the boxes.
They’re fun to make, adorable to look at, and bring a sweet surprise to every bite.
Whether you’re planning a summer gender reveal party or keeping it low-key with family, I hope this tutorial helps make your moment even more memorable. 💗💙
Let me know in the comments — are you team pink or team blue?