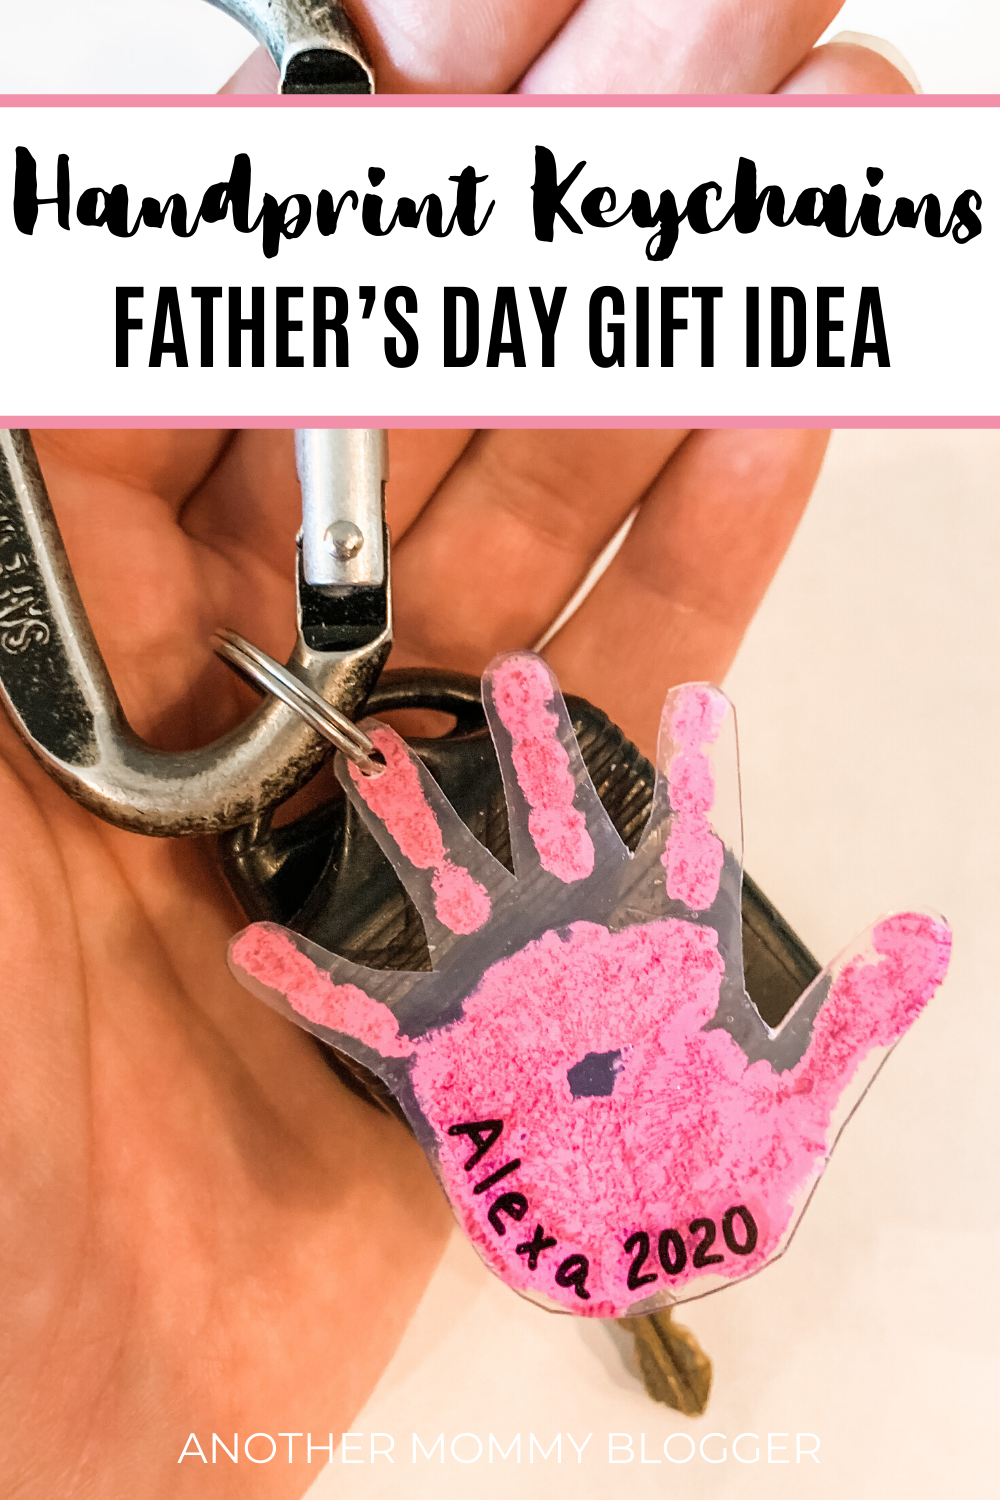
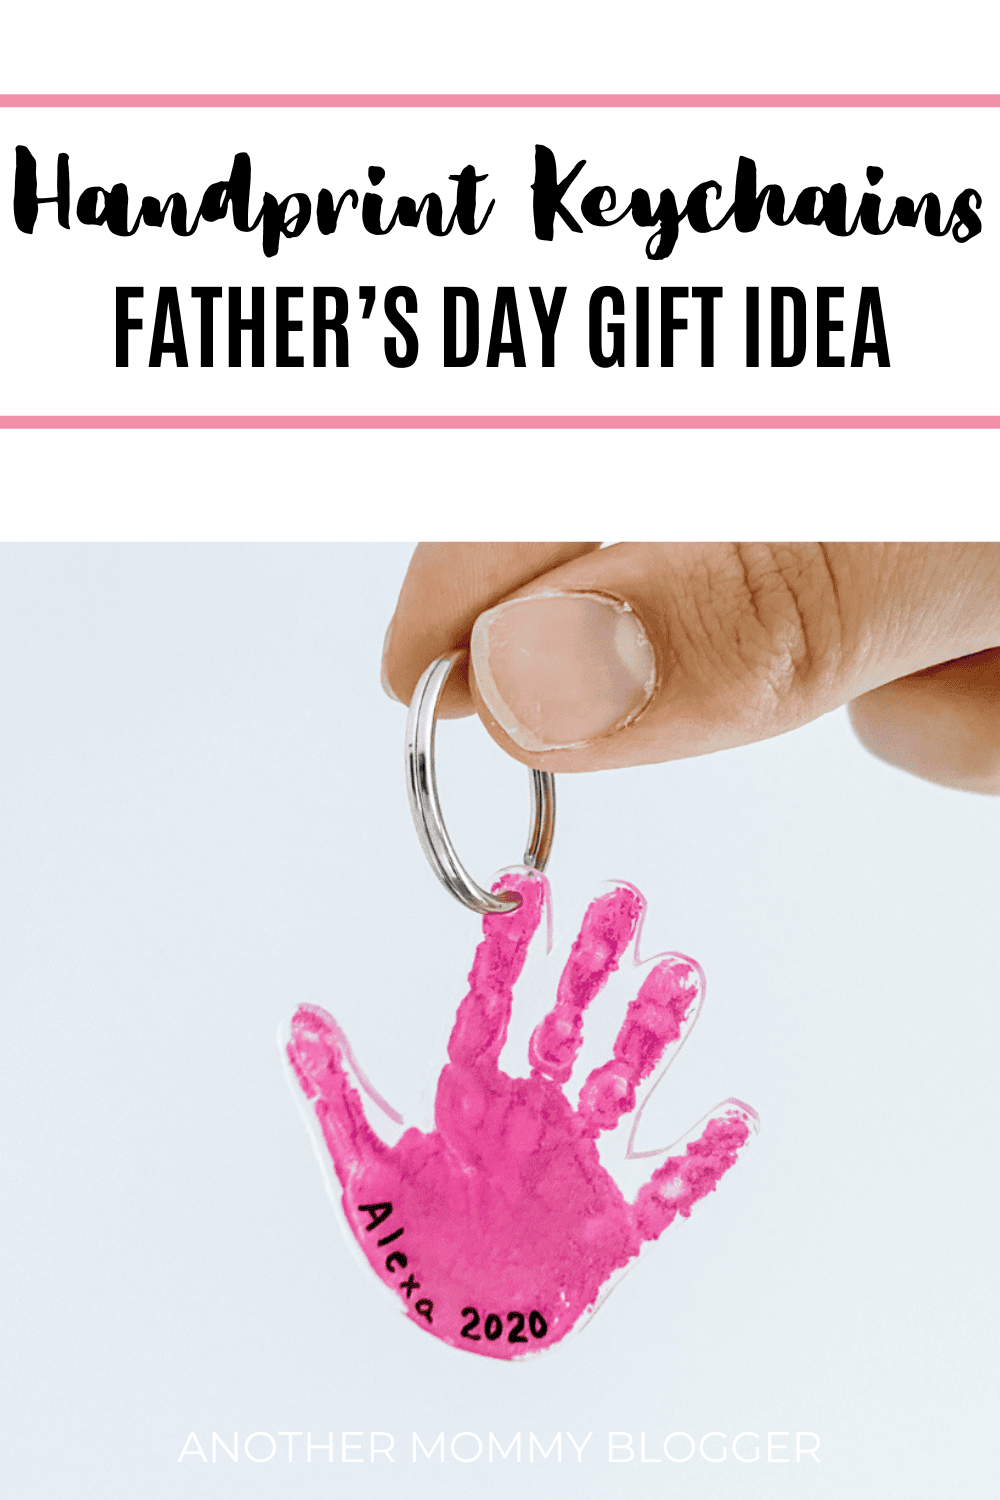
Looking for the perfect Father’s Day gift that kids can make themselves? These DIY Handprint Keychains are an adorable, personal gift idea that dads, moms, and grandparents will treasure forever.
A few years ago, my daughter Alexa and I made these keychains together as a Father’s Day gift for her dad, and they turned out so cute we ended up making extras for family members too.
Not only are they simple to make, but they also capture a little piece of your child’s handprint forever.
In this step-by-step guide, I’ll show you exactly how to make these easy, heartfelt keychains using shrink film and a few basic craft supplies. Trust me, you’re going to want to make more than one!
📌Don’t lose it, pin it for later!
DIY Kids Handprint Keychains
This post contains affiliate links. For more information, please read my disclosure here.
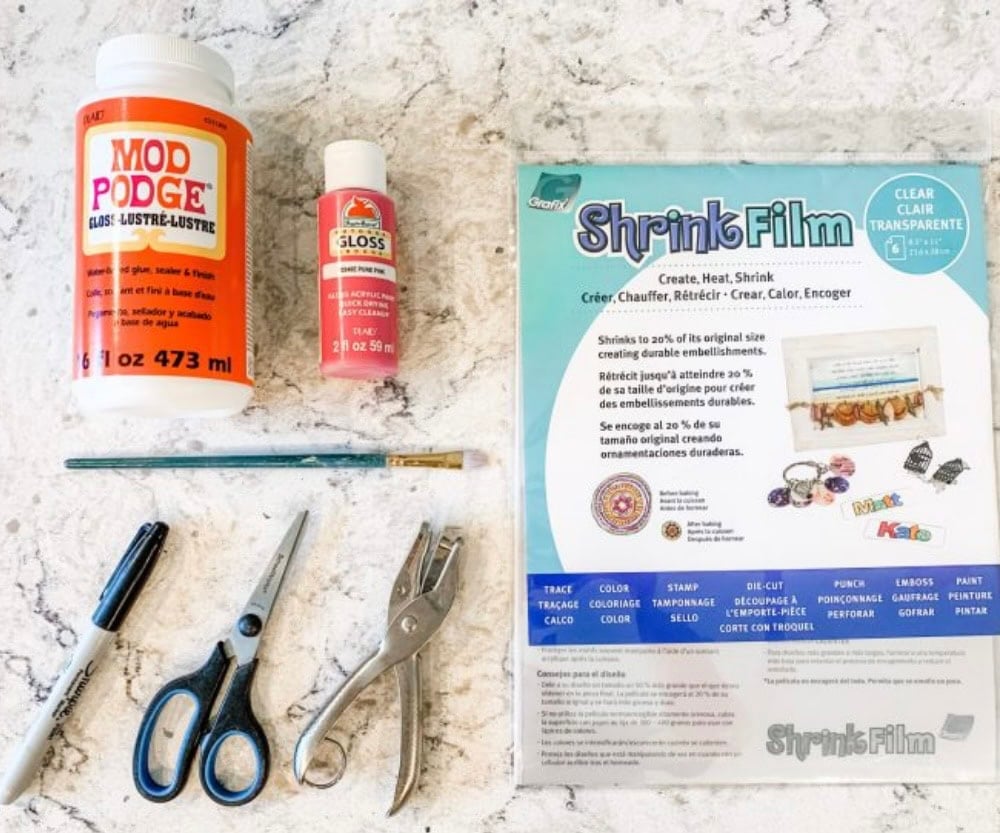
Materials:
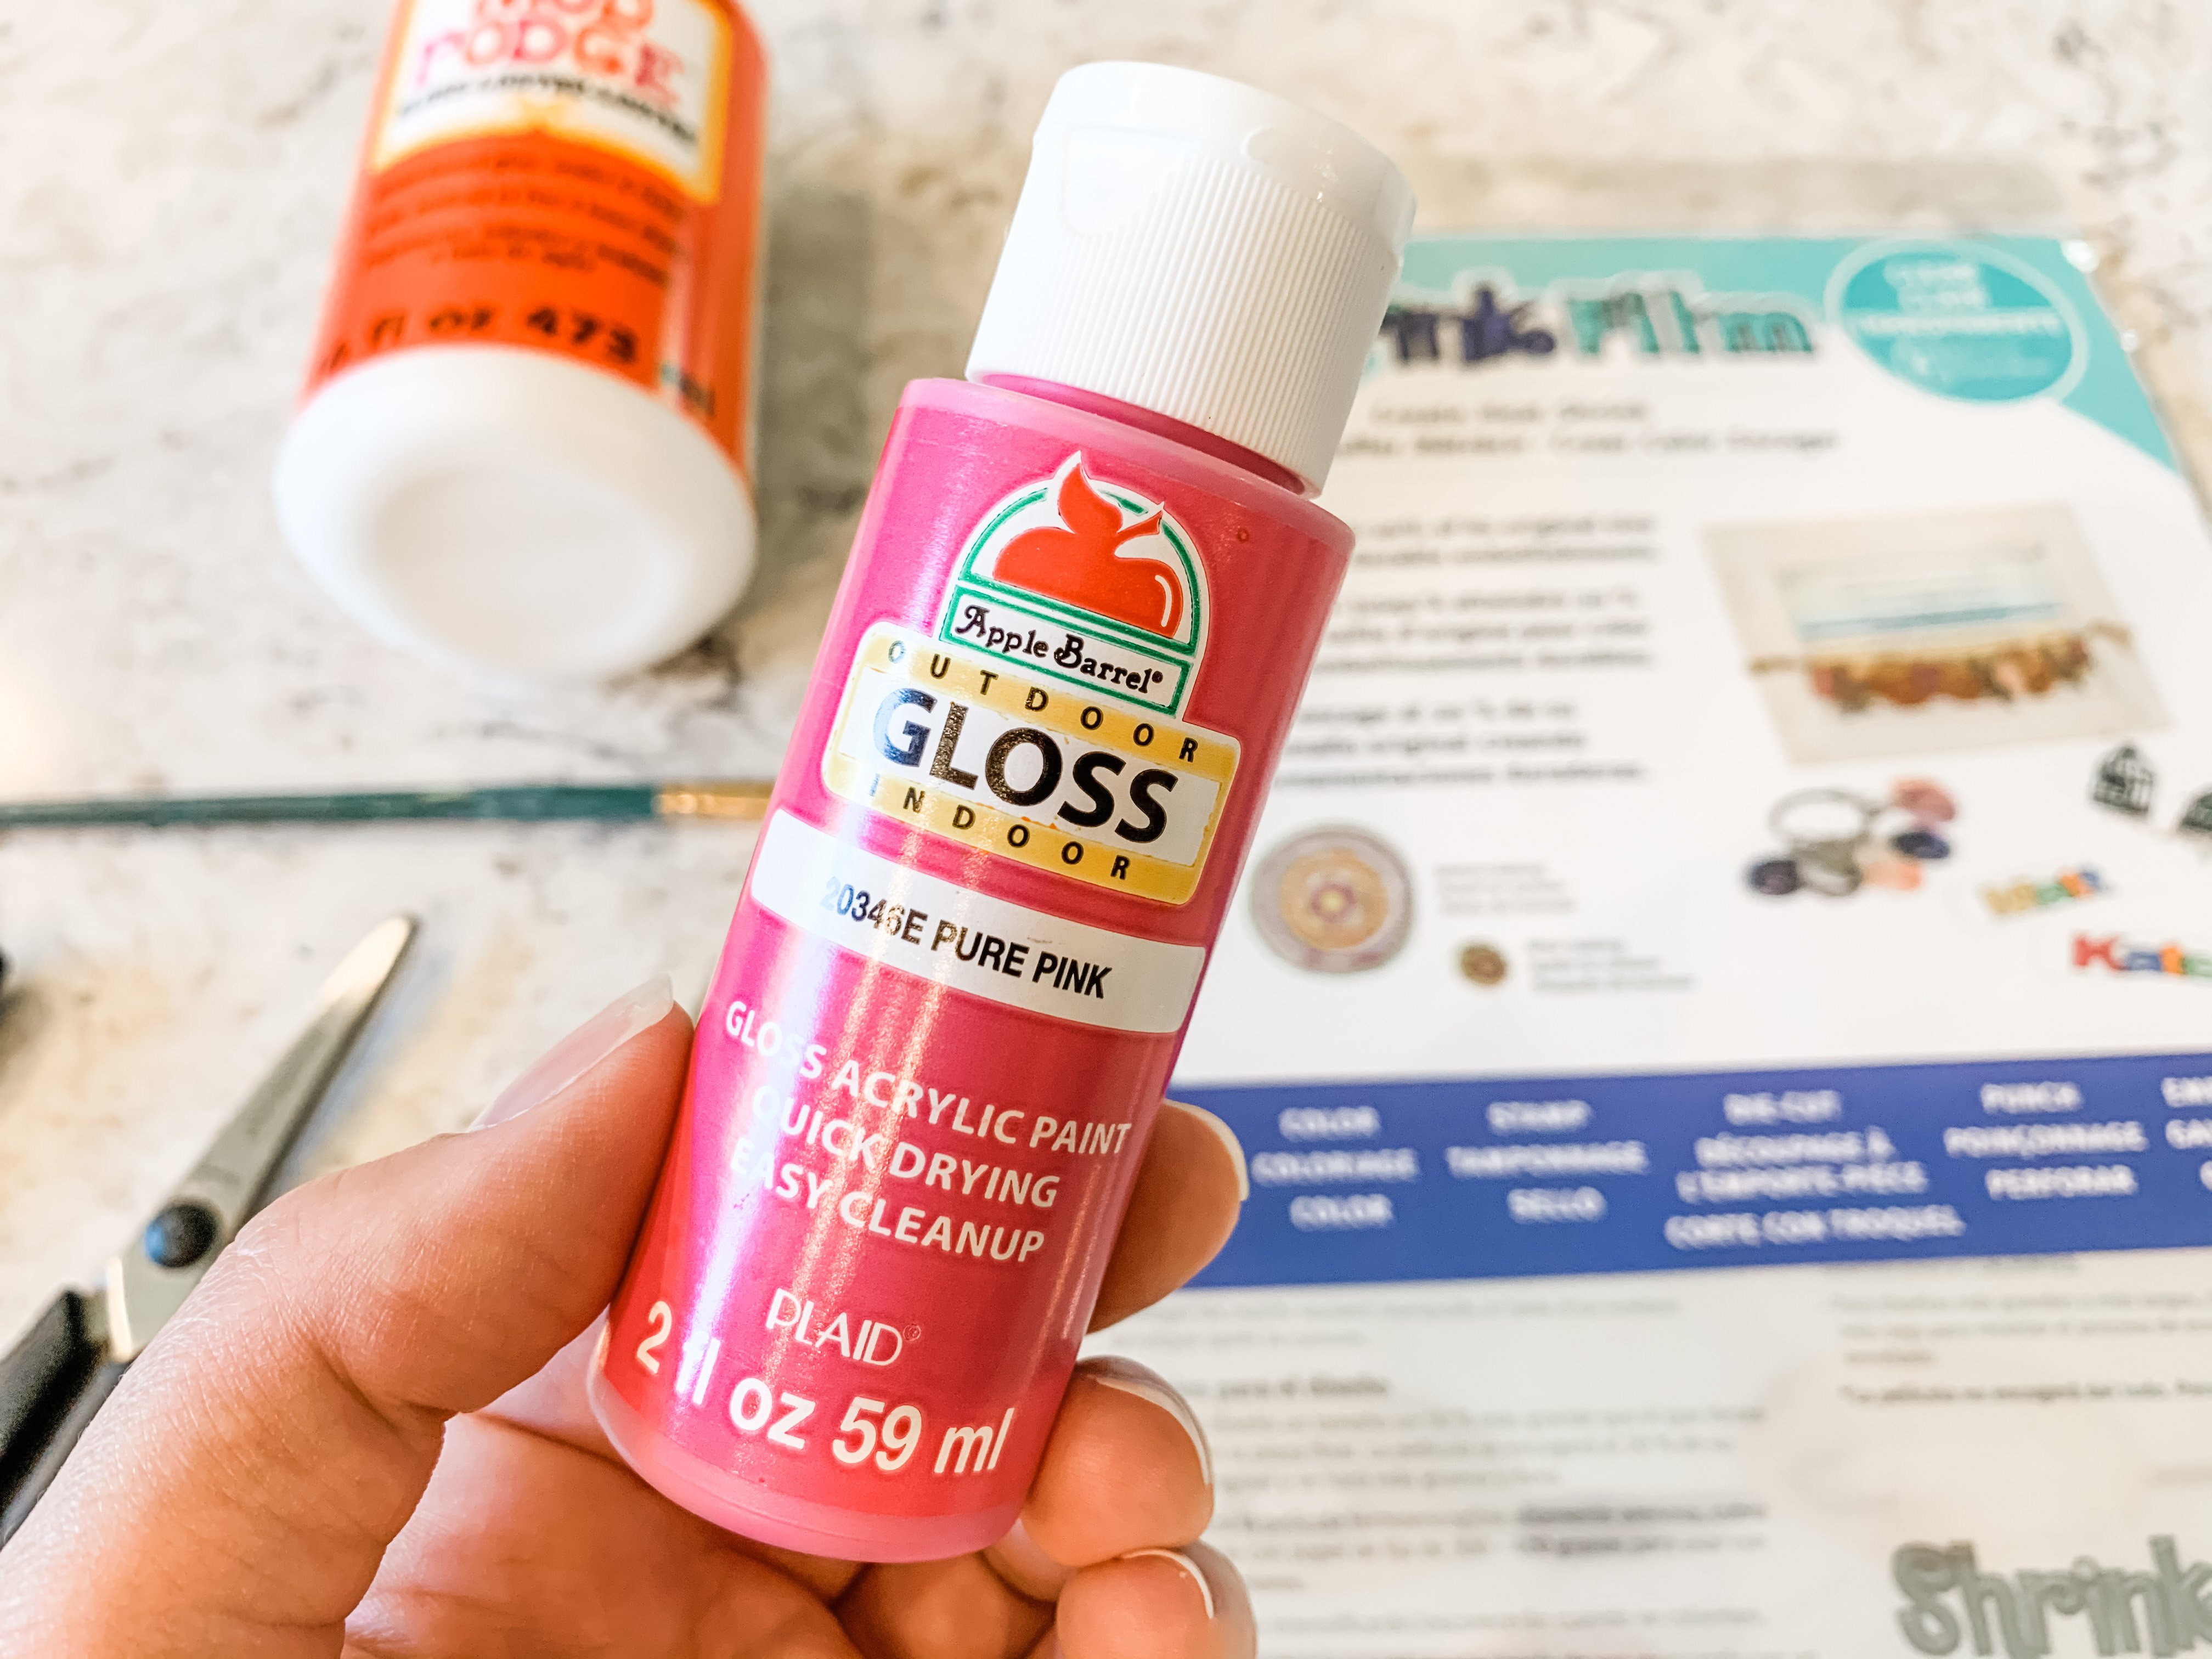
- Clear ShrinkFilm Sheets
- Apple Barrel Outdoor Indoor Gloss Paint
- Mod Podge
- Paint Brush
- Scissors
- Sharpie Marker
- Hole Punch
- Parchment Paper
- Baking Sheet
Side Note:
I only tried this with clear ShrinkFilm. I’m sure you could use the frosted film but you won’t see your child’s handprint as clearly.
I used the Apple Barrel Indoor Outdoor Gloss paint that I mentioned above. I haven’t tried this project with any other paint.
I have seen comments that people have used other paints that wouldn’t stick to the plastic so I can only recommend the apple barrel paint you can find here.
Project Tips
Doing any project with young kids that involves paint can get messy fast. Before you start this craft have all your supplies together.
I also recommend having some wet paper towels ready so you can clean the paint from your child’s hand quickly.
Step One
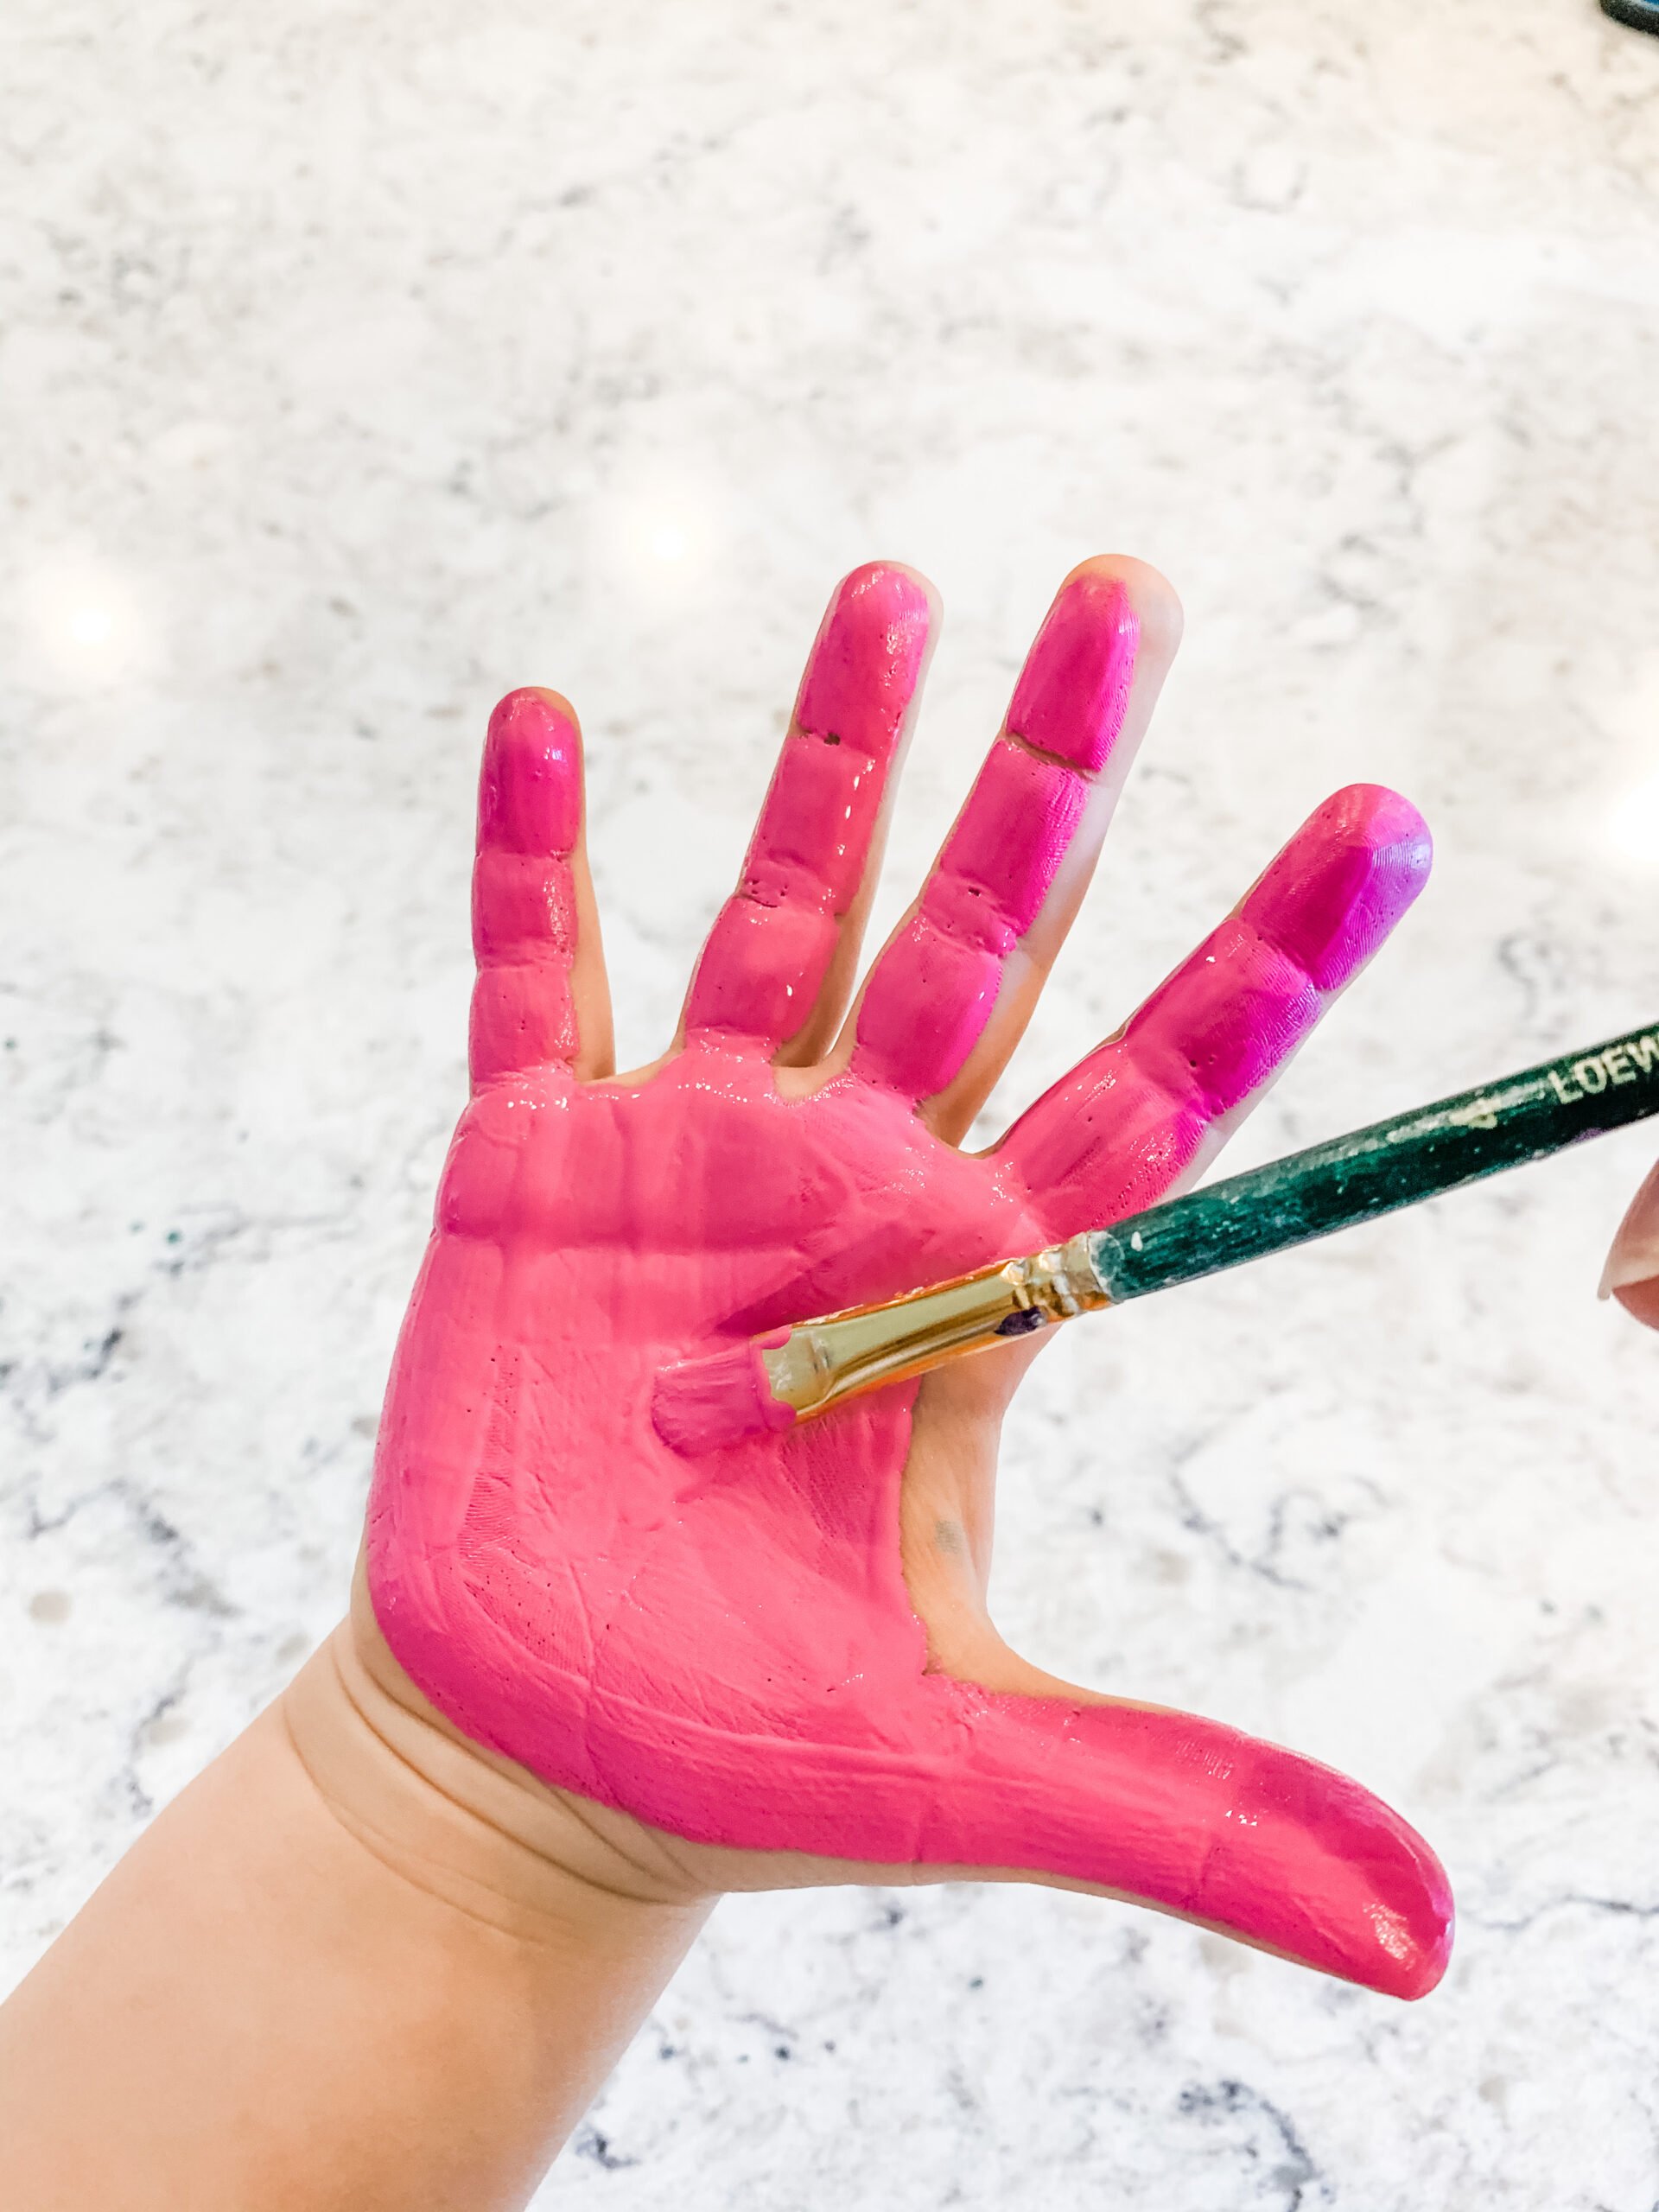
Use your paint brush to paint your child’s hand. You want enough paint on them to make a print but not so much that you lose the details of their hand.
Step Two
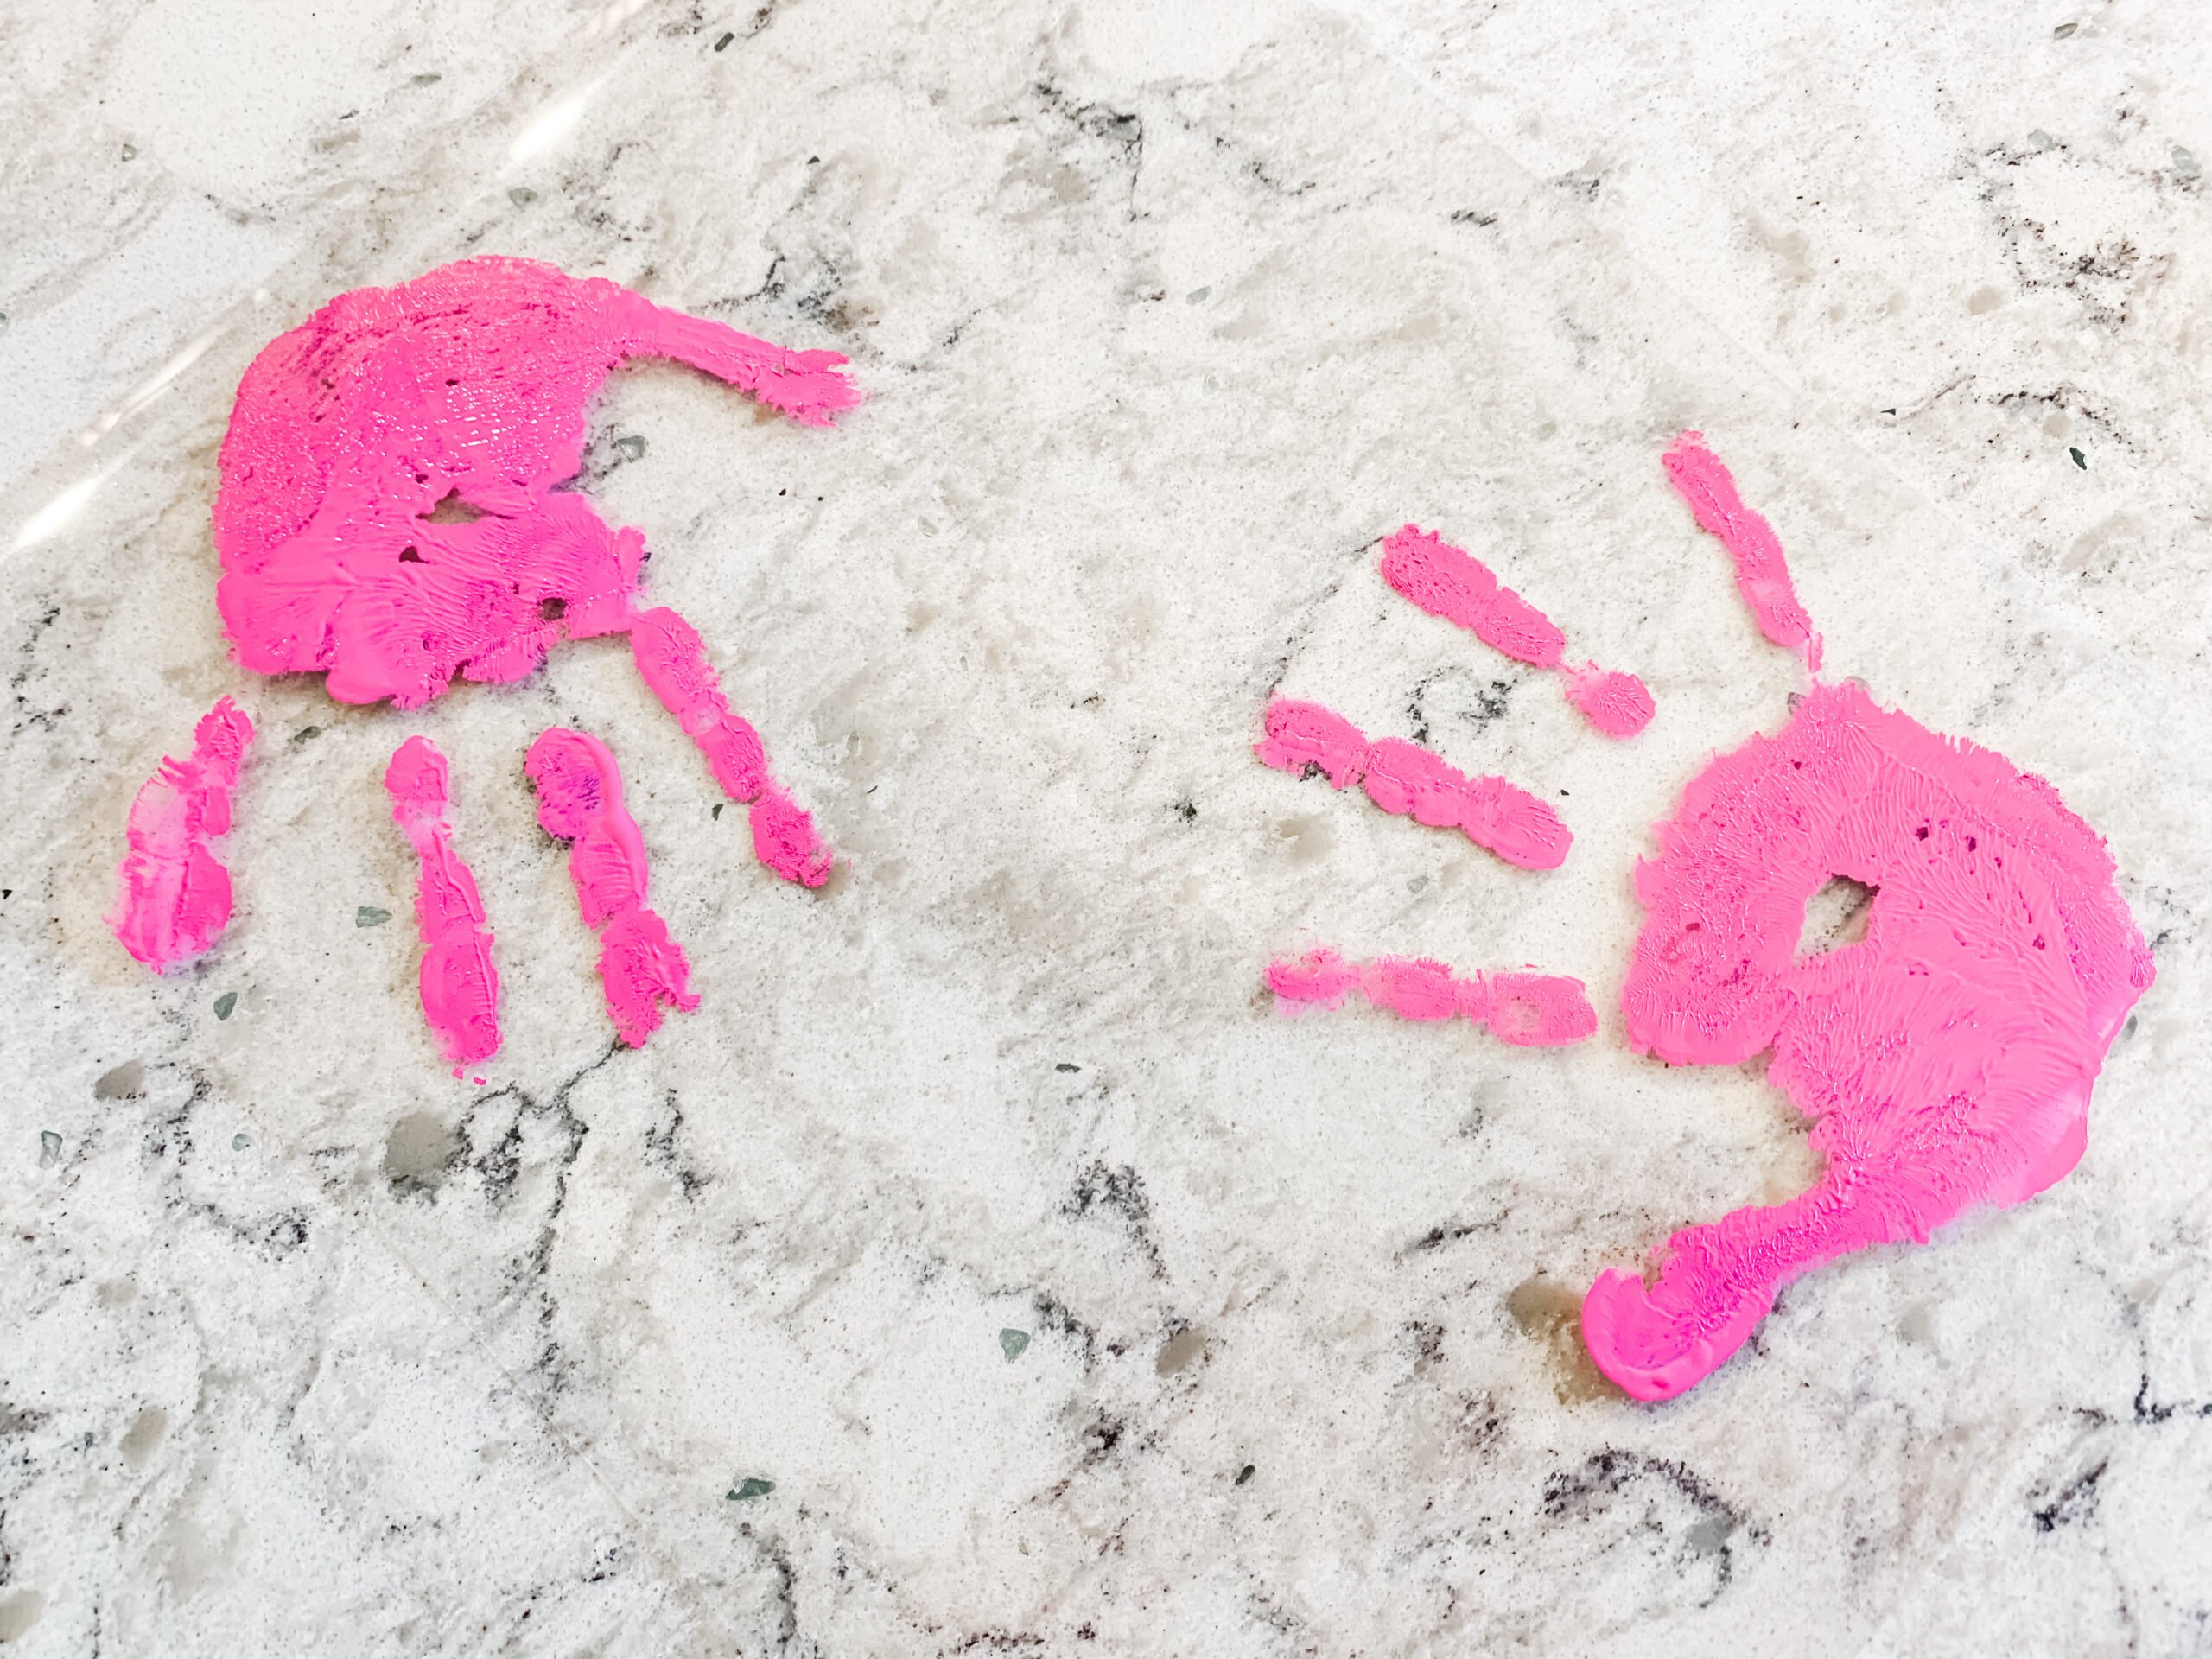
Slowly guide your child’s hand onto the ShrinkFilm. Gently press on their hand and fingers to make sure to get their handprint fully transferred.
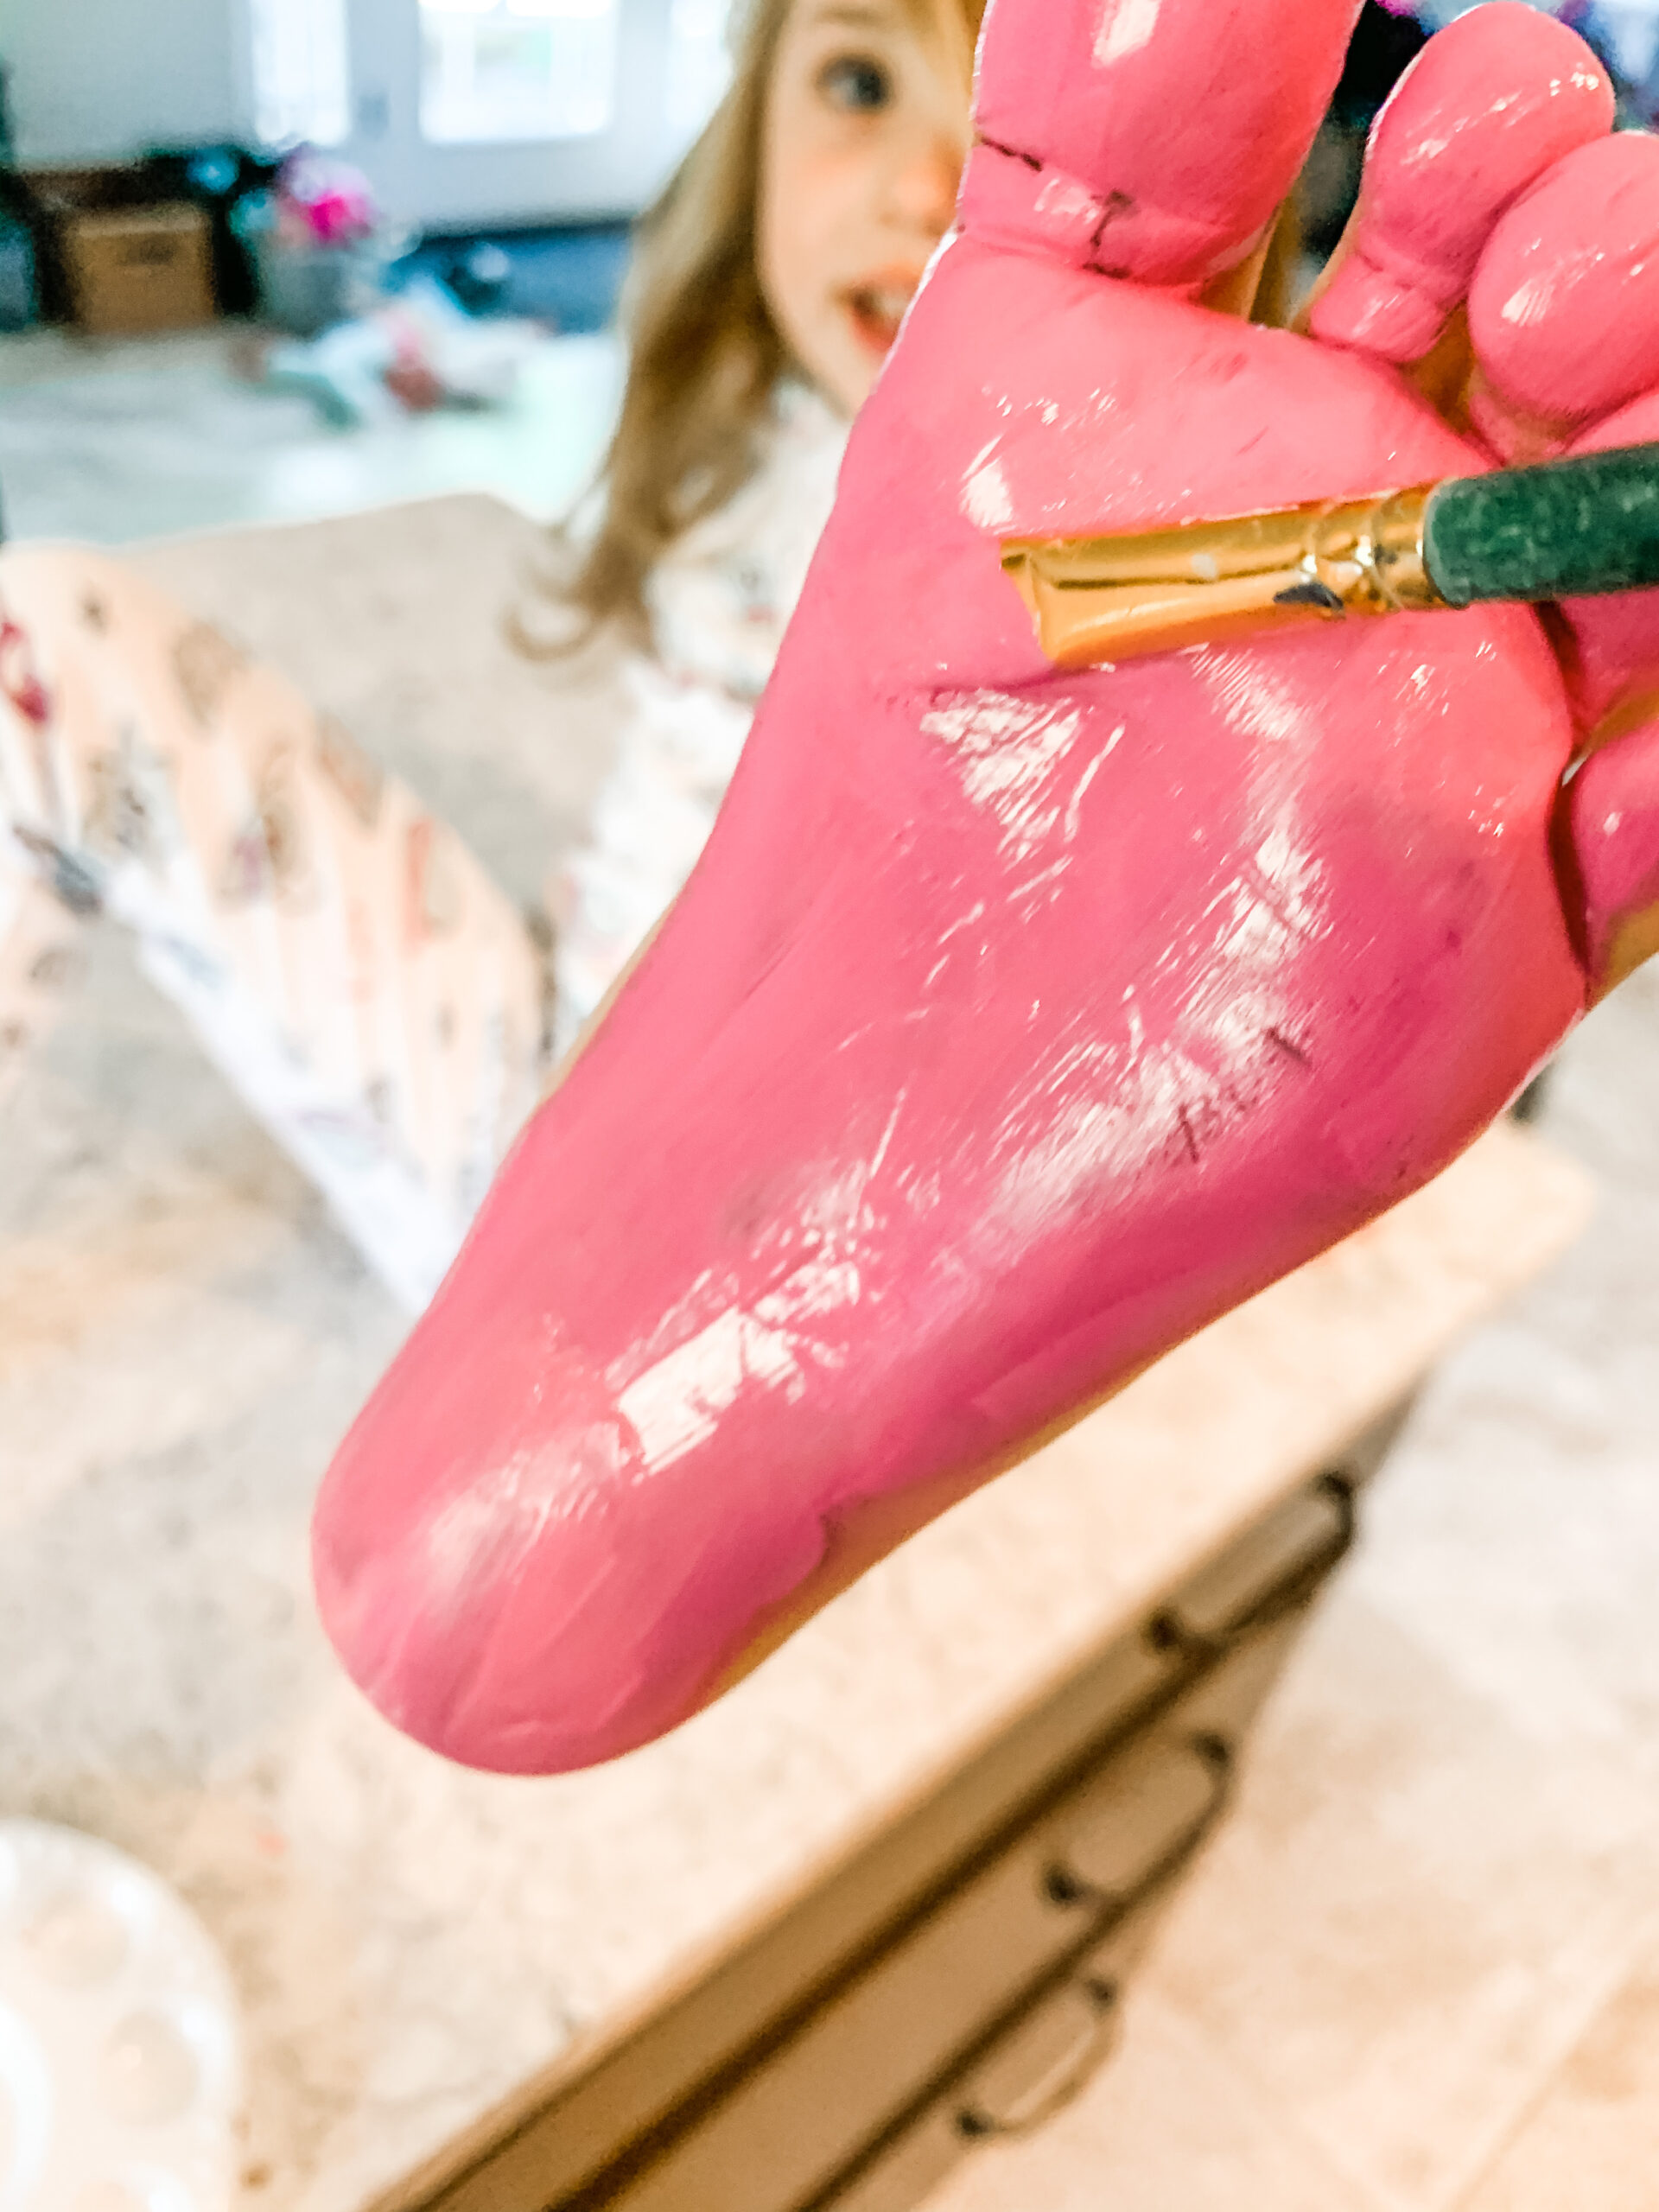
Alexa asked if I could do her foot too. The footprint keychains turned out cute too but she didn’t like how much the brush tickled her feet and thing started to get messy. Just a heads up if you want to try a footprint.
Step Three
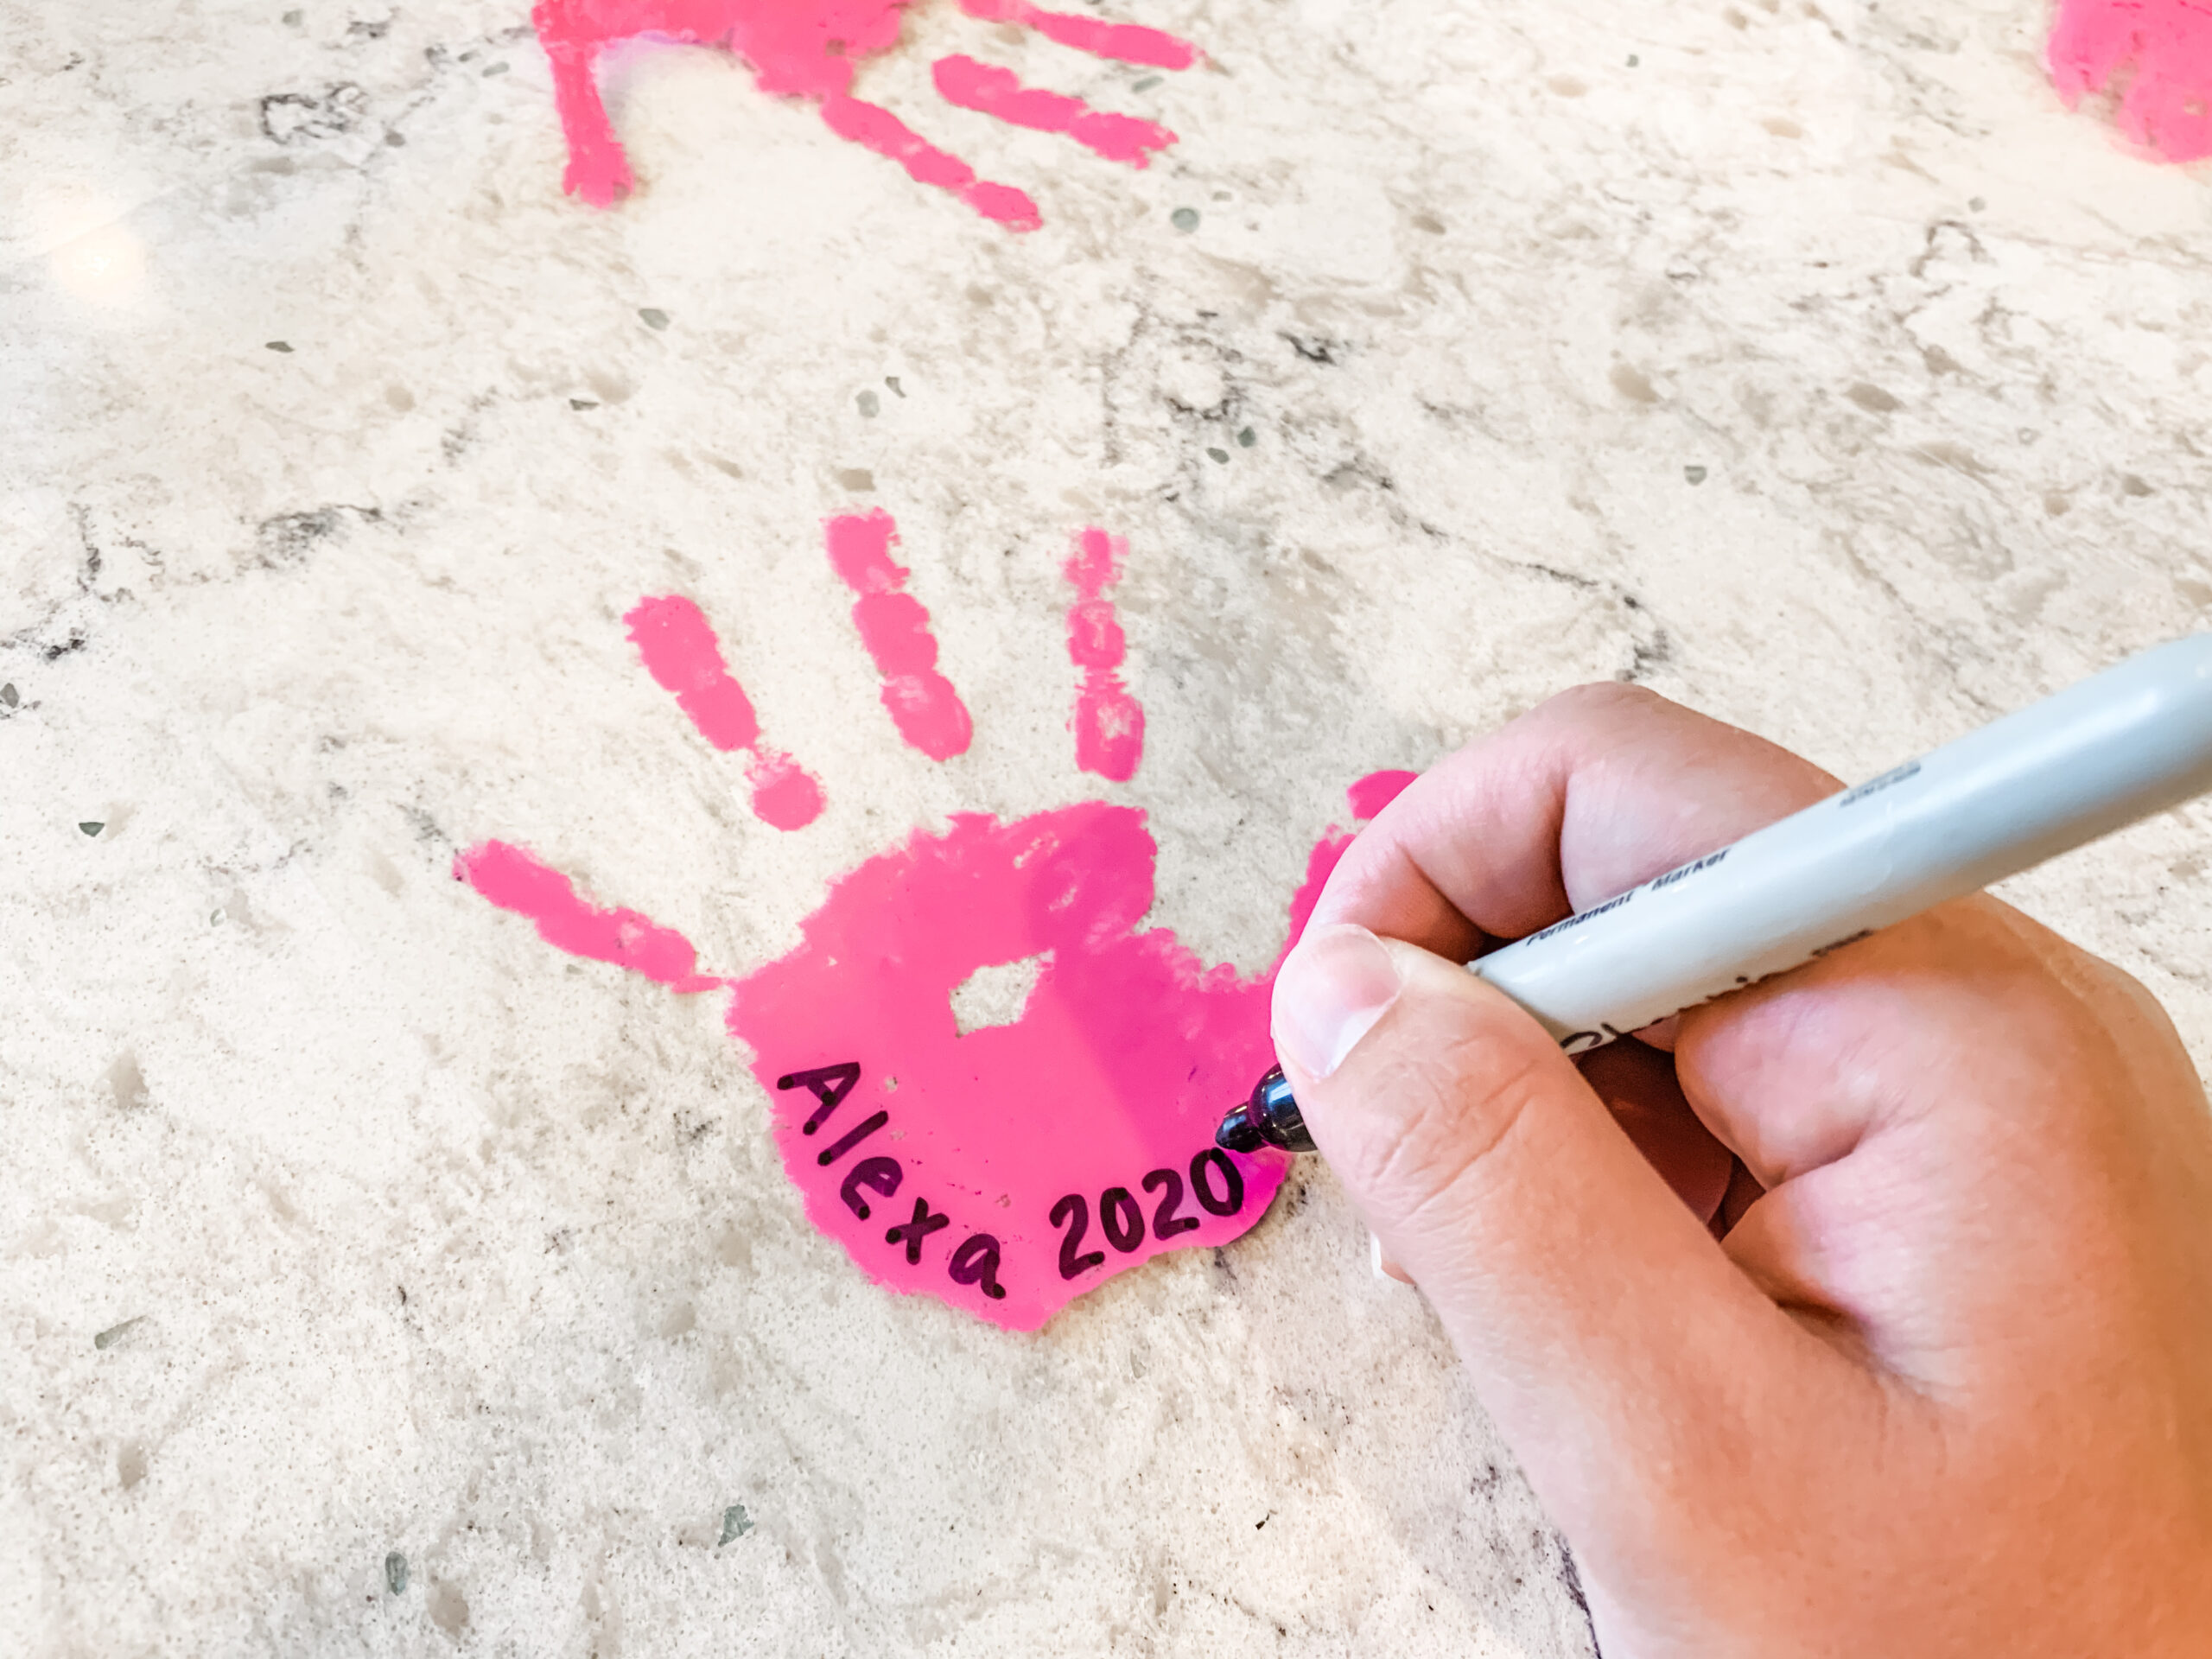
Once your handprints have dried completely you can flip the sheet over and add your child’s name, the year or their age with a sharpie marker.
Step Four
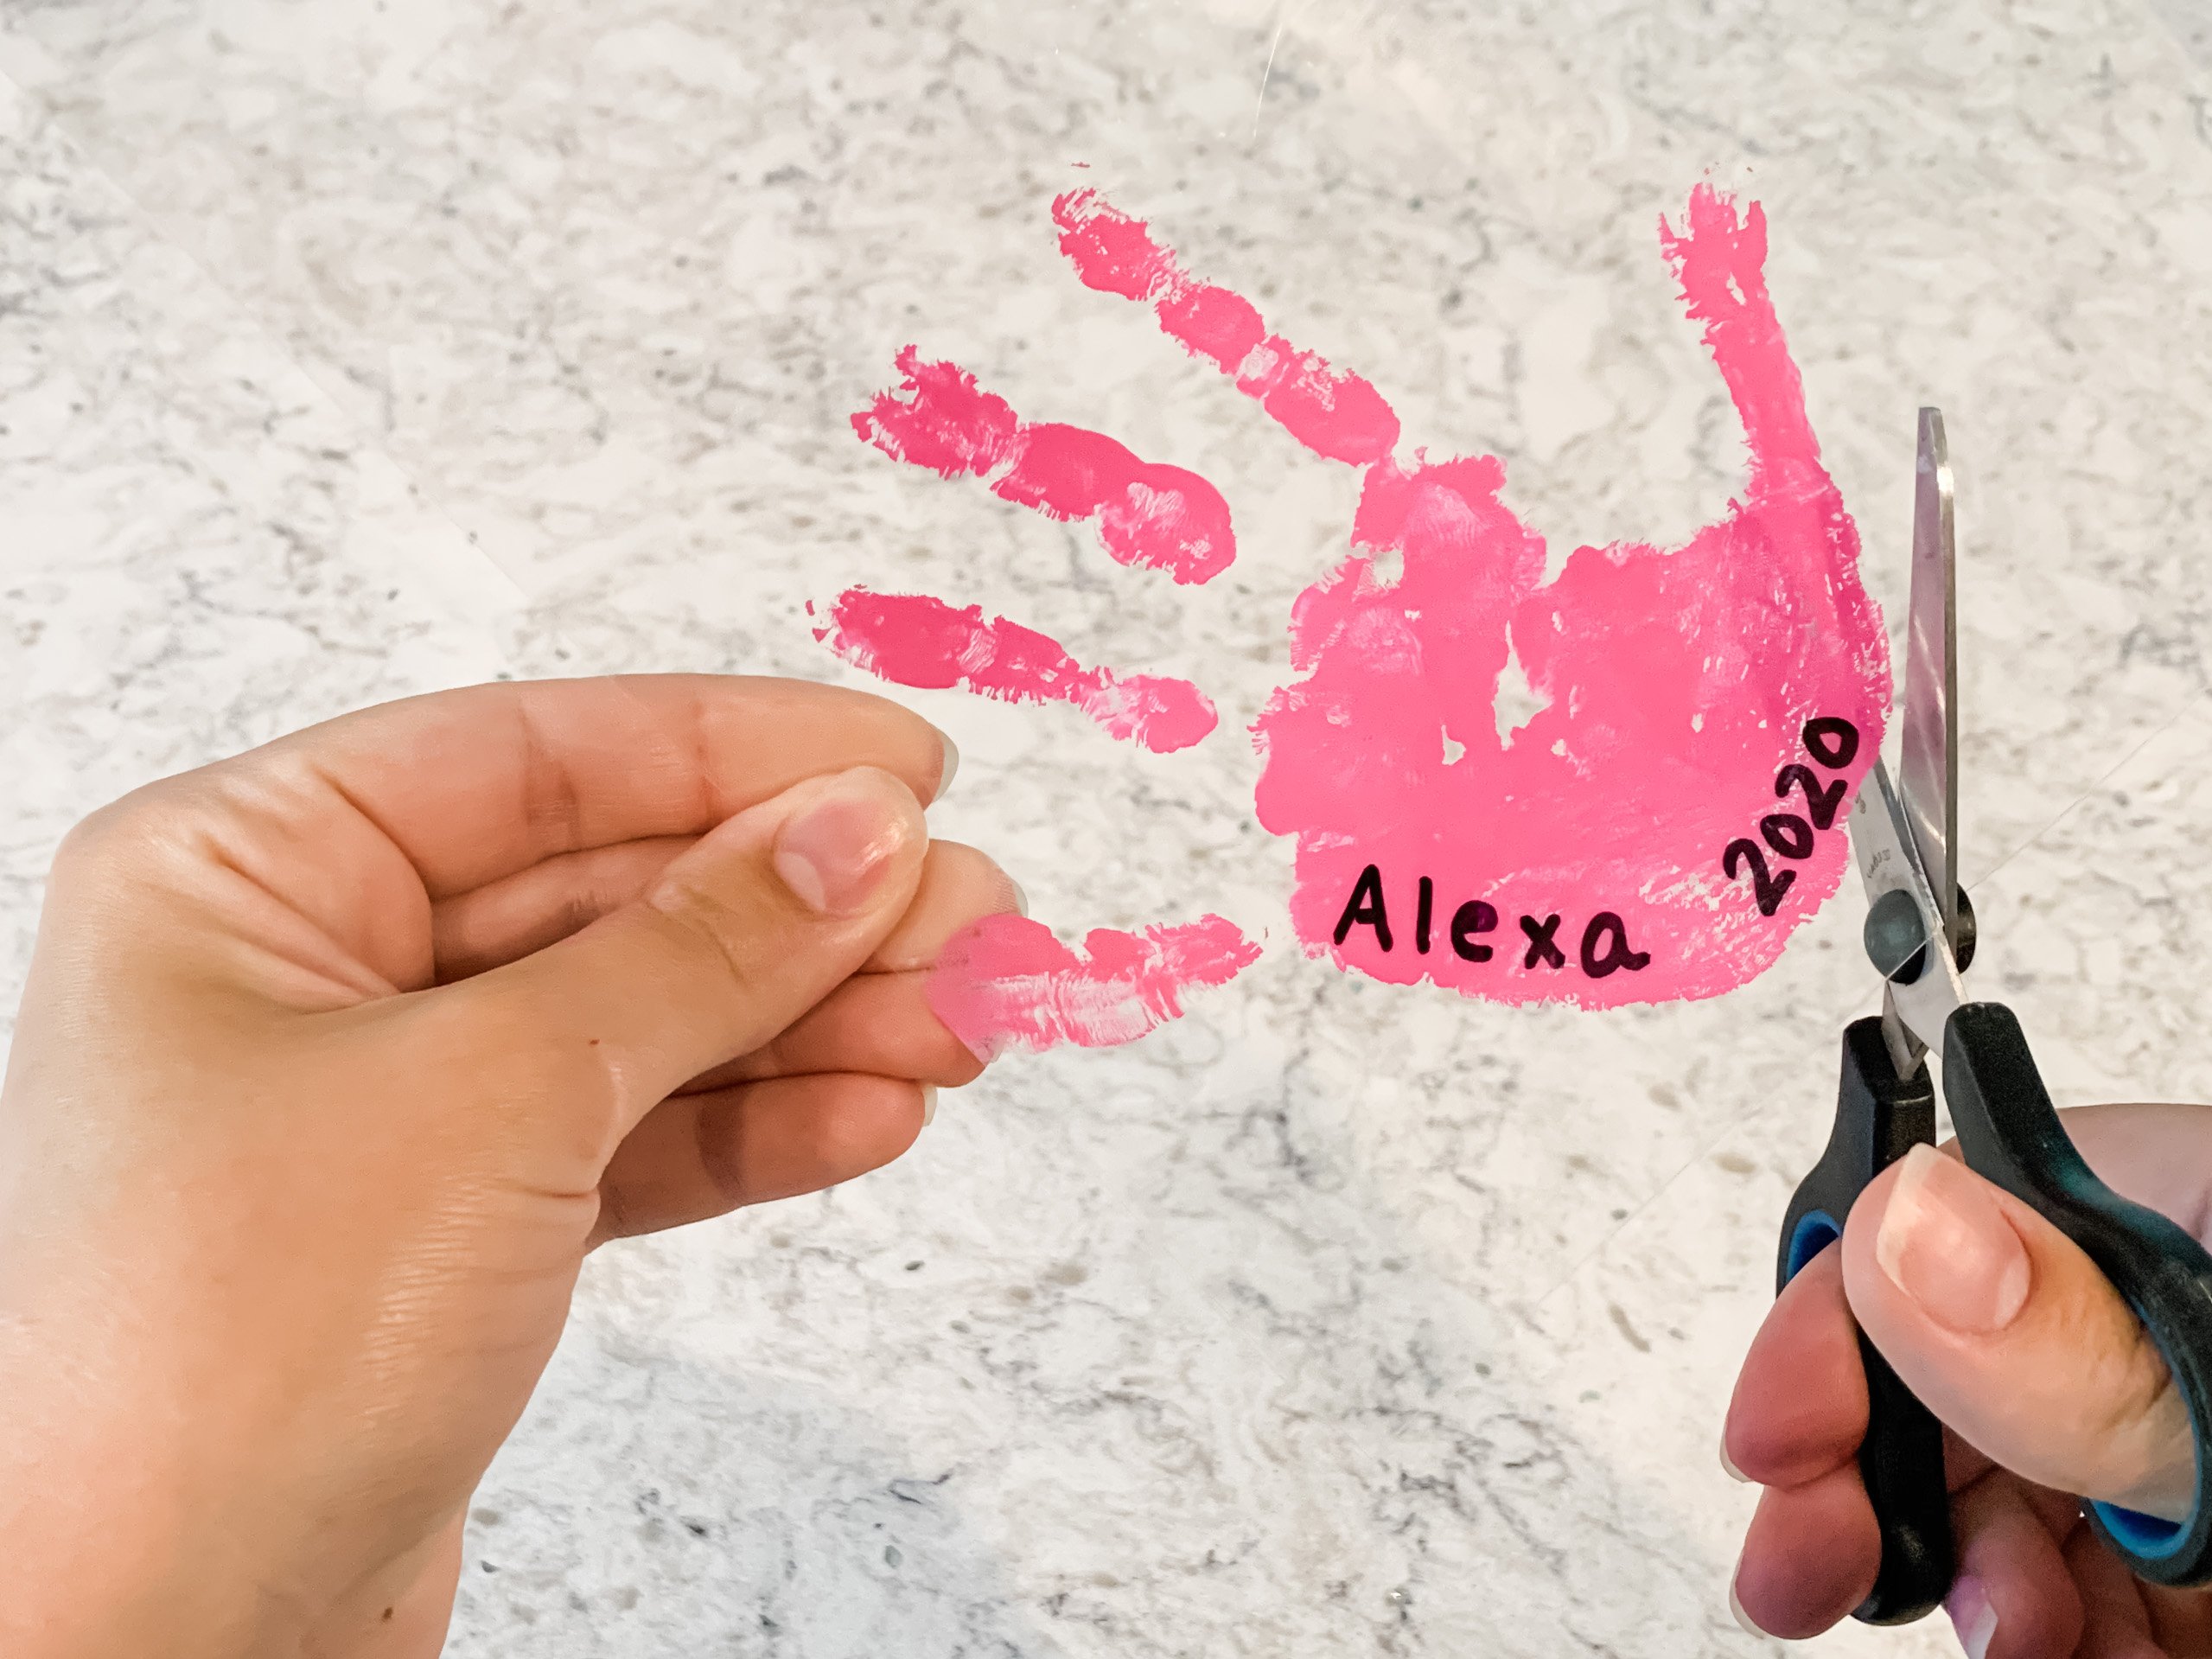
Once the marker dries completely use scissors to cut out the handprints. It’s easier to use a smaller pair of scissors like these.
You can cut in between the fingers if you would like but just don’t make them too thin or they could curl and stick to each other in the oven.
Step Five
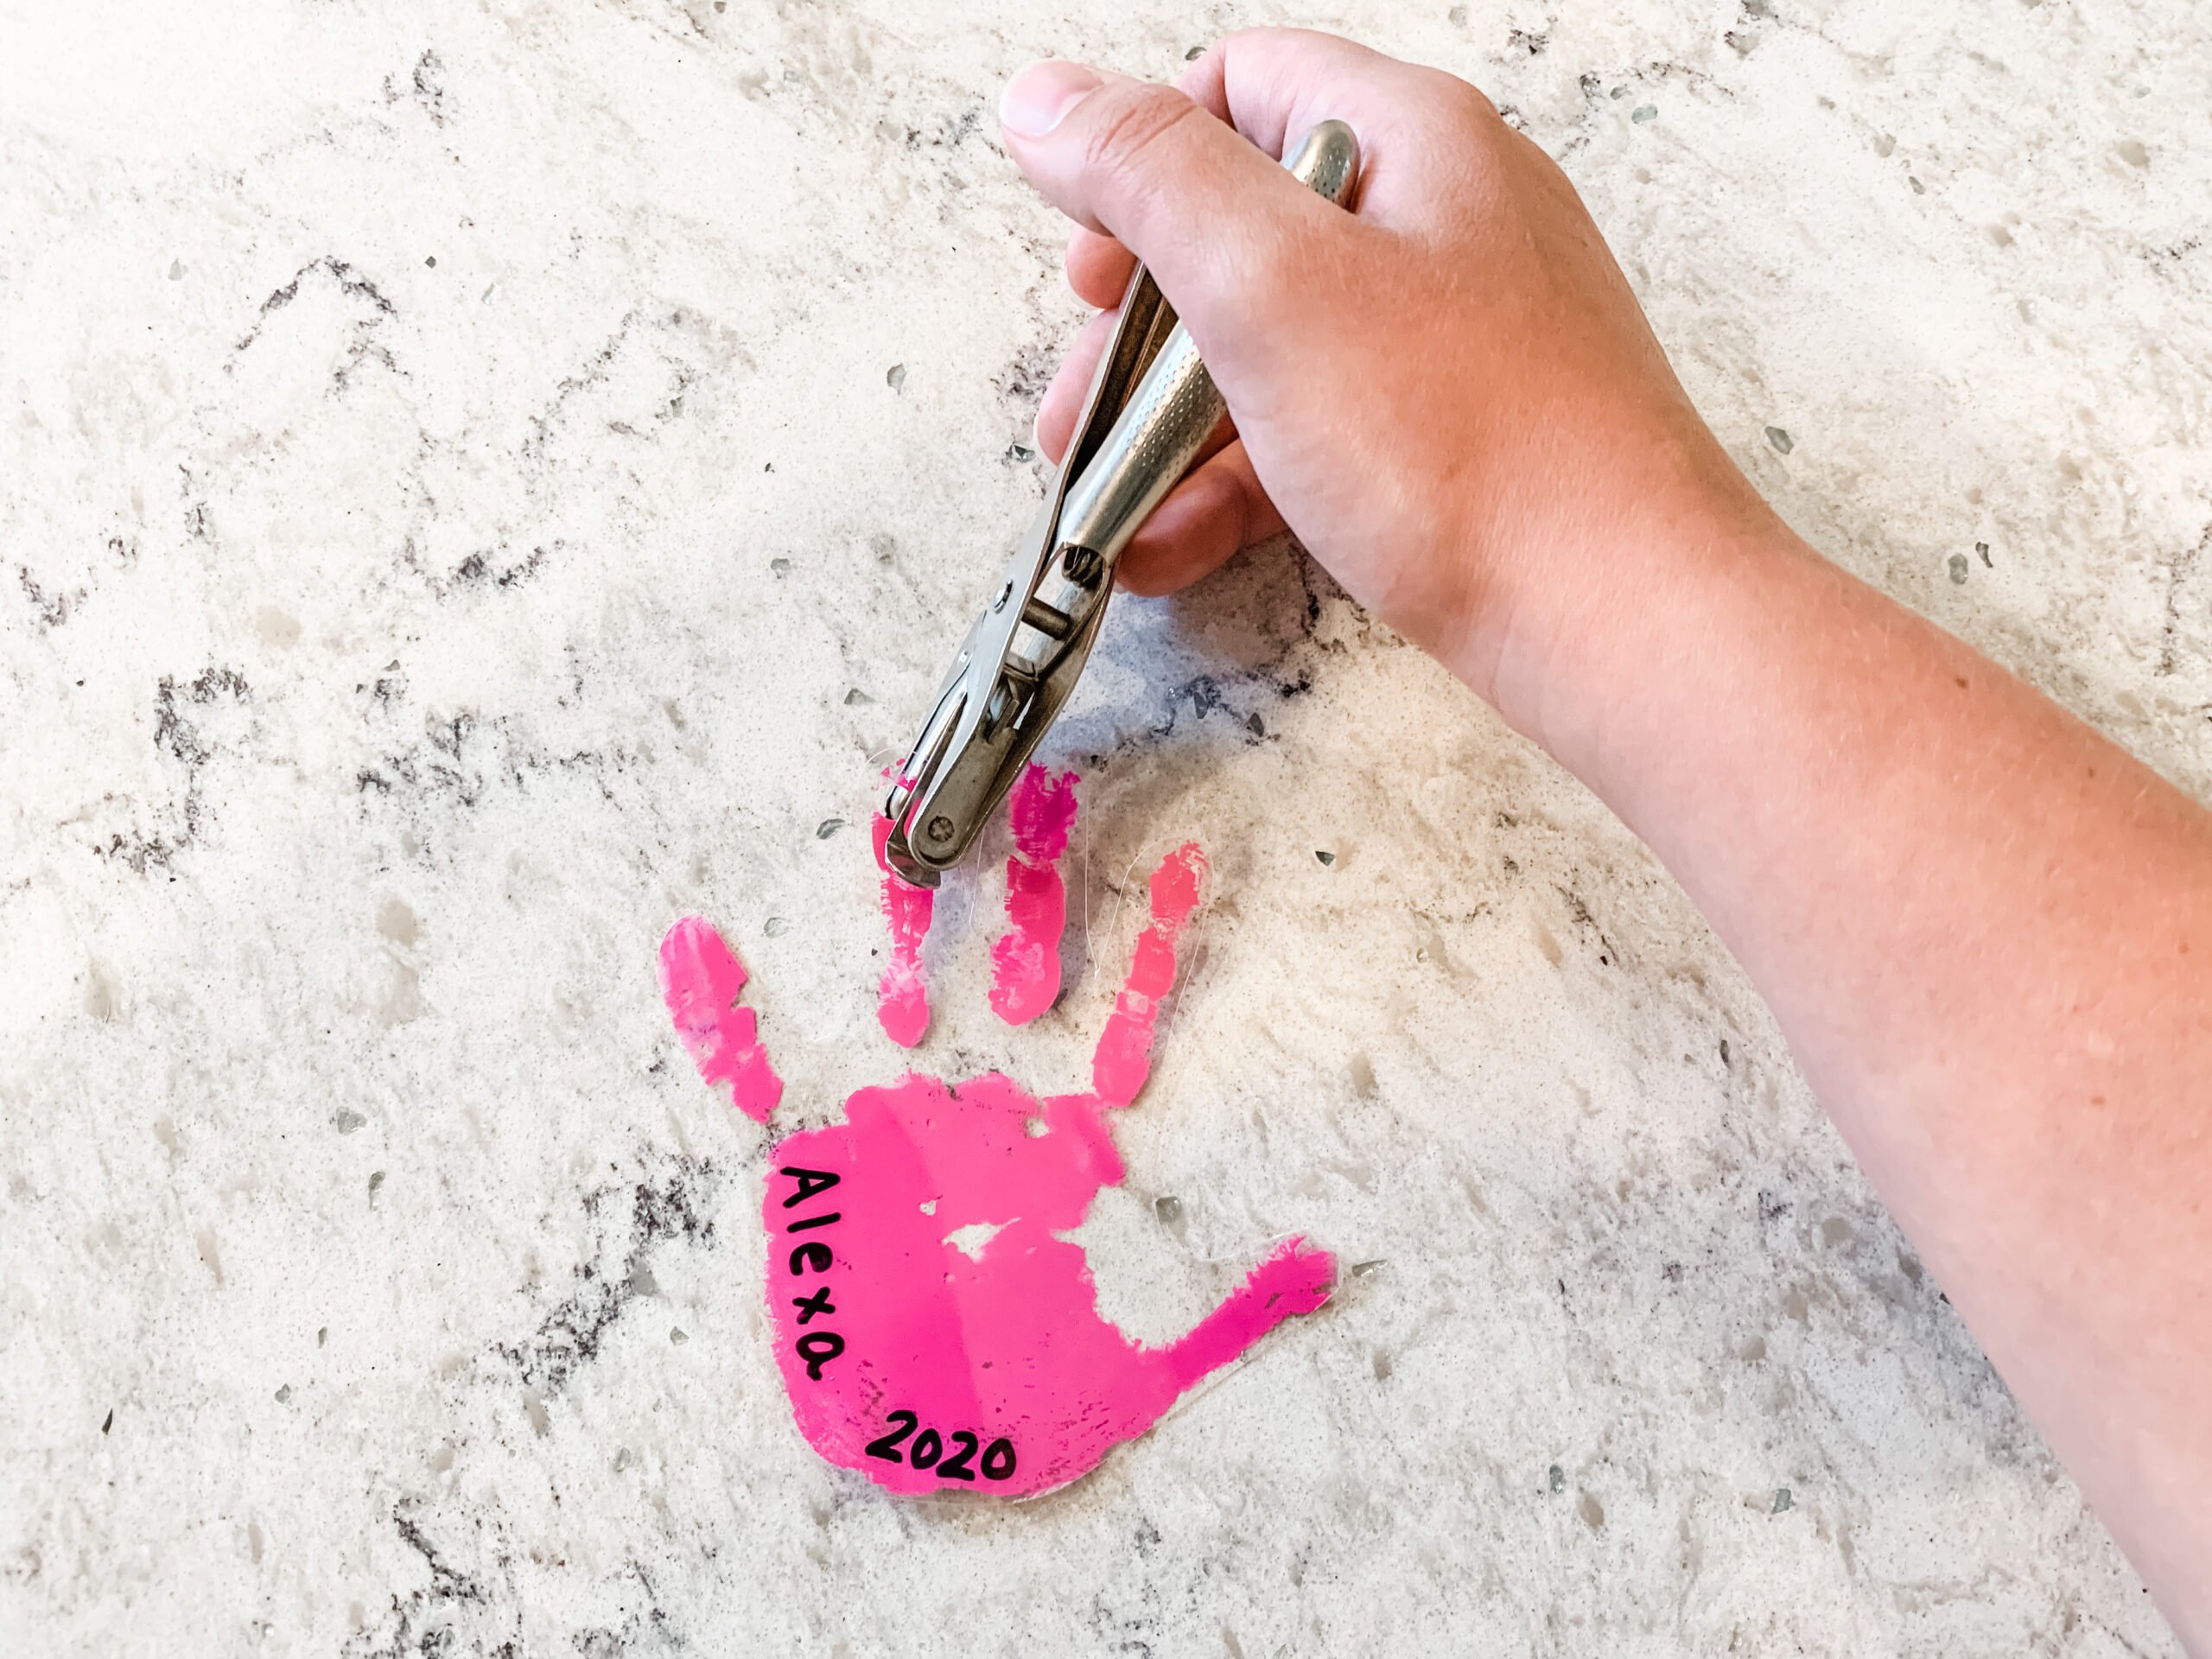
Don’t forget to punch a whole in your handprints before baking. I think they look best and hang best when you put your whole on one of the three middle fingers.
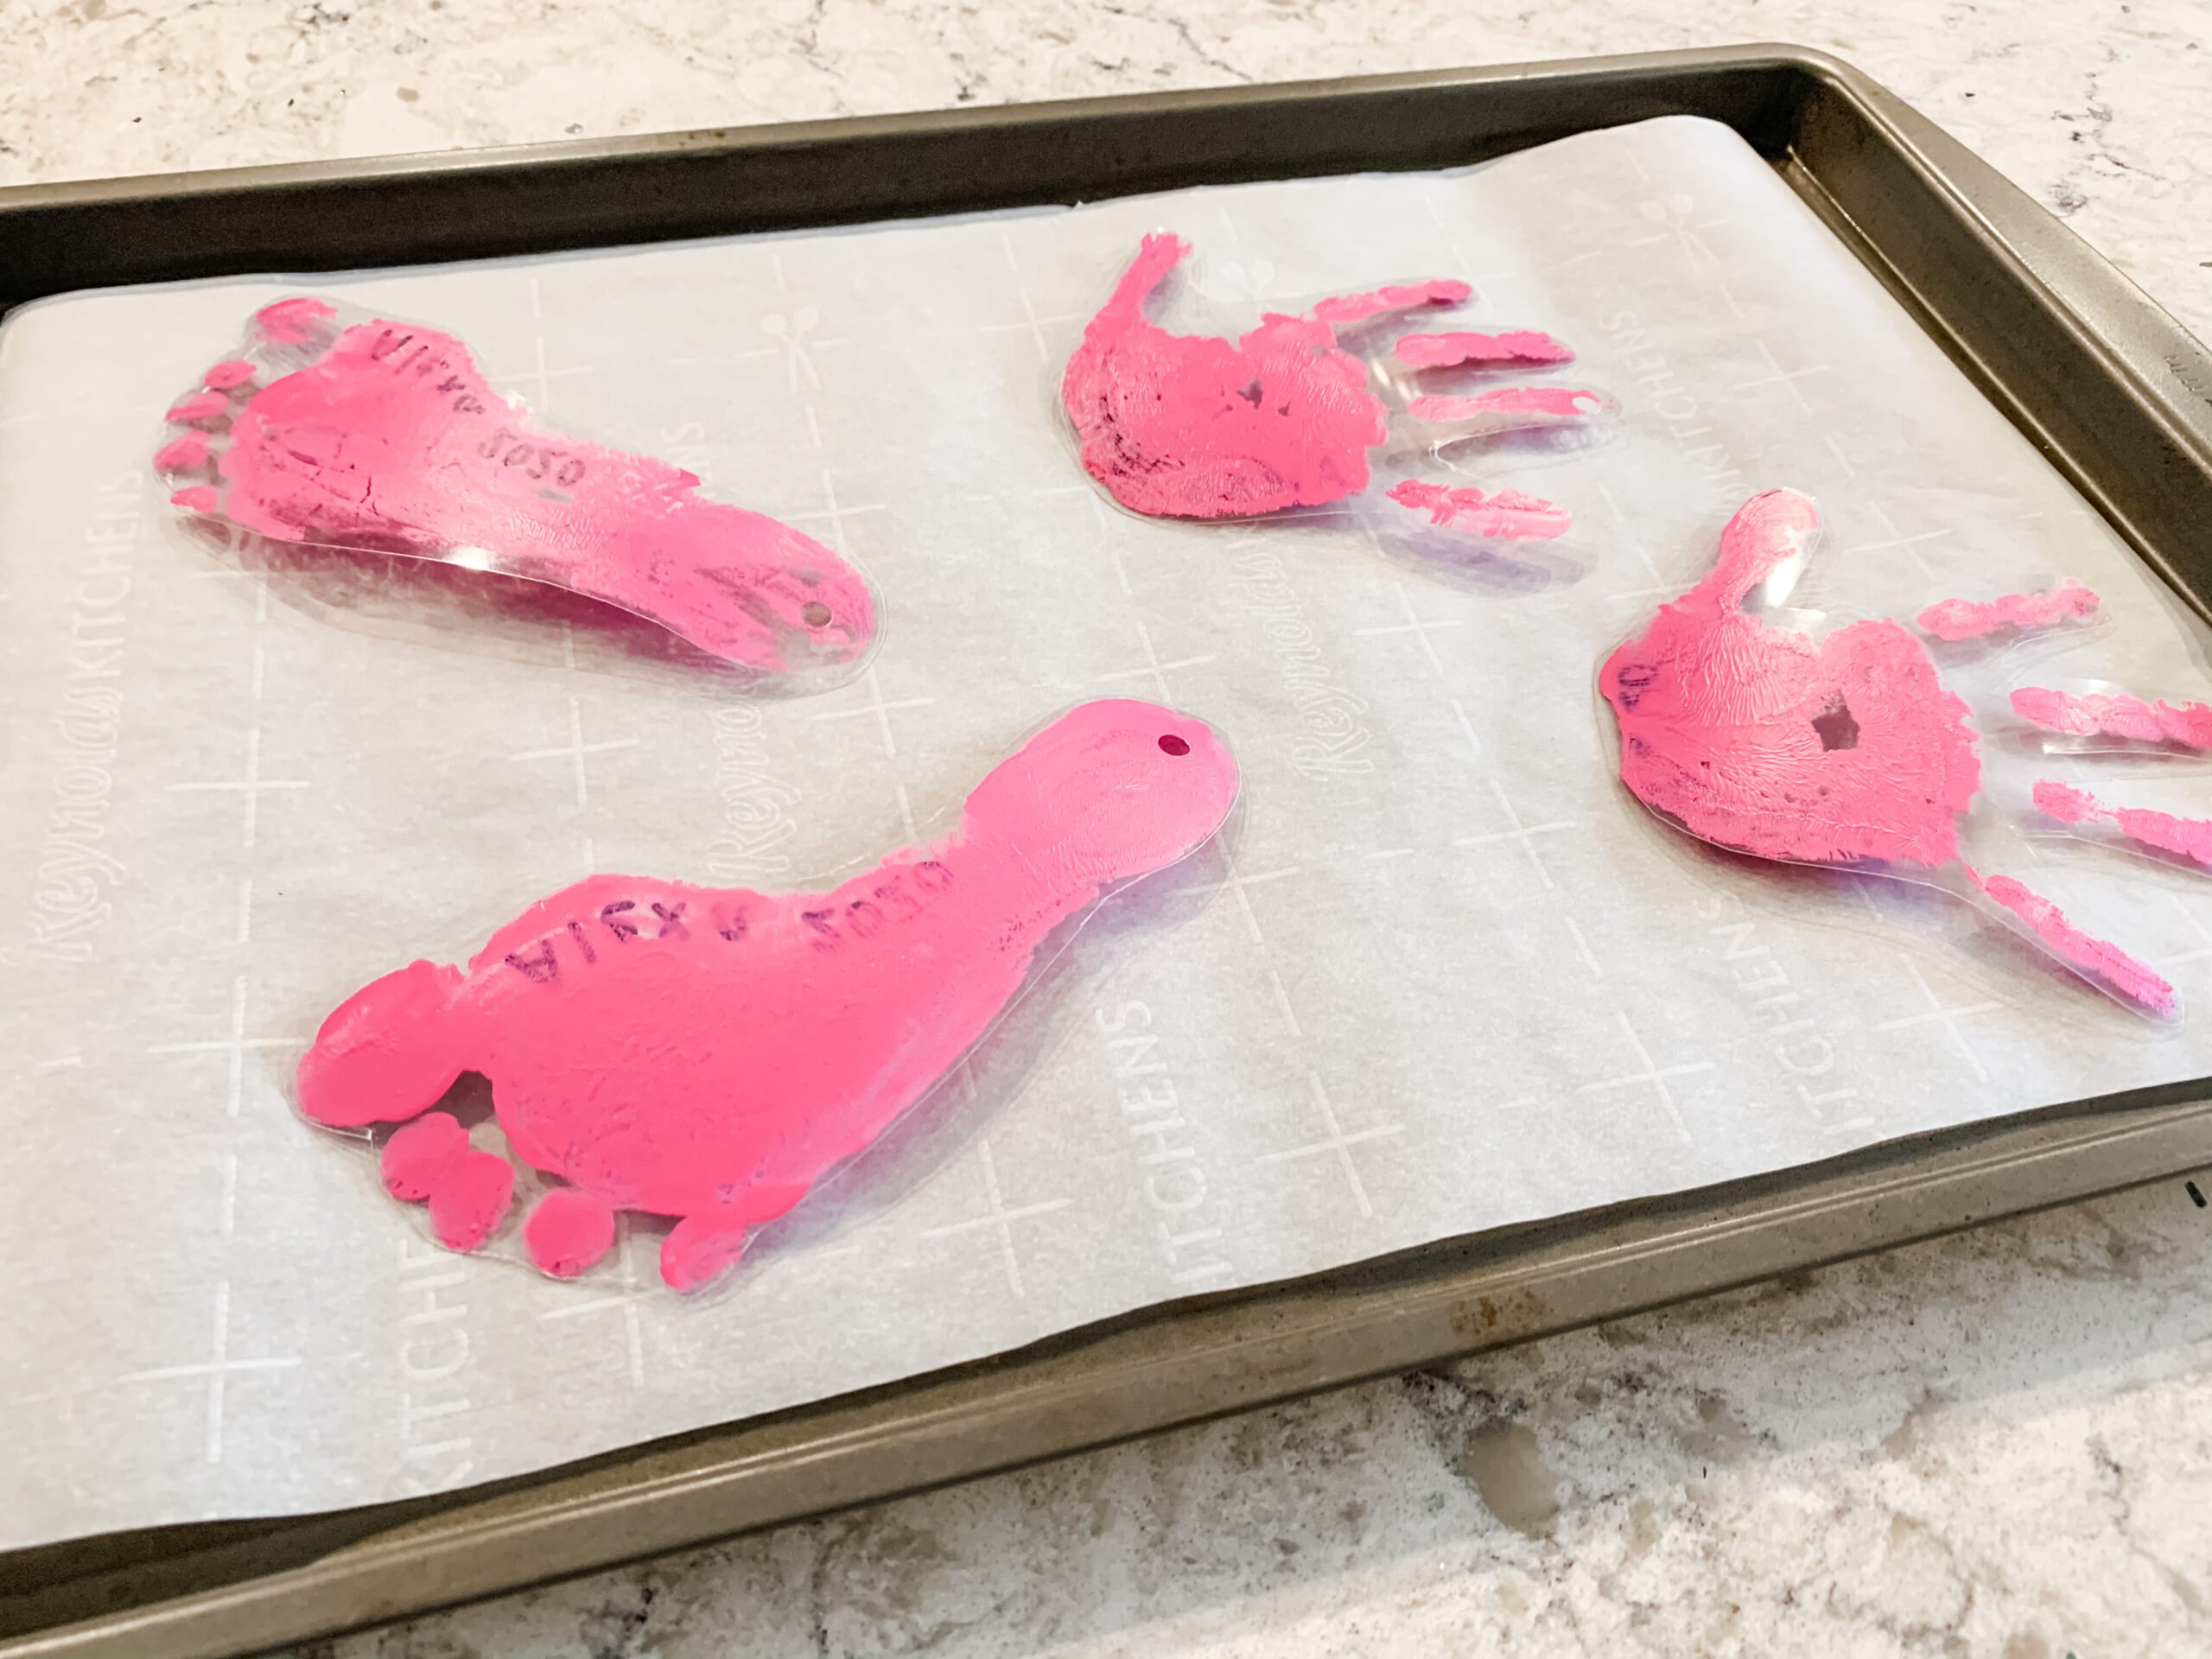
Step Six
Line a baking sheet with parchment paper and place your prints marker side down, paint side up. Make sure not to crowd your baking sheet because they do move while baking and they may stick to each other if they’re too close.
Step Seven
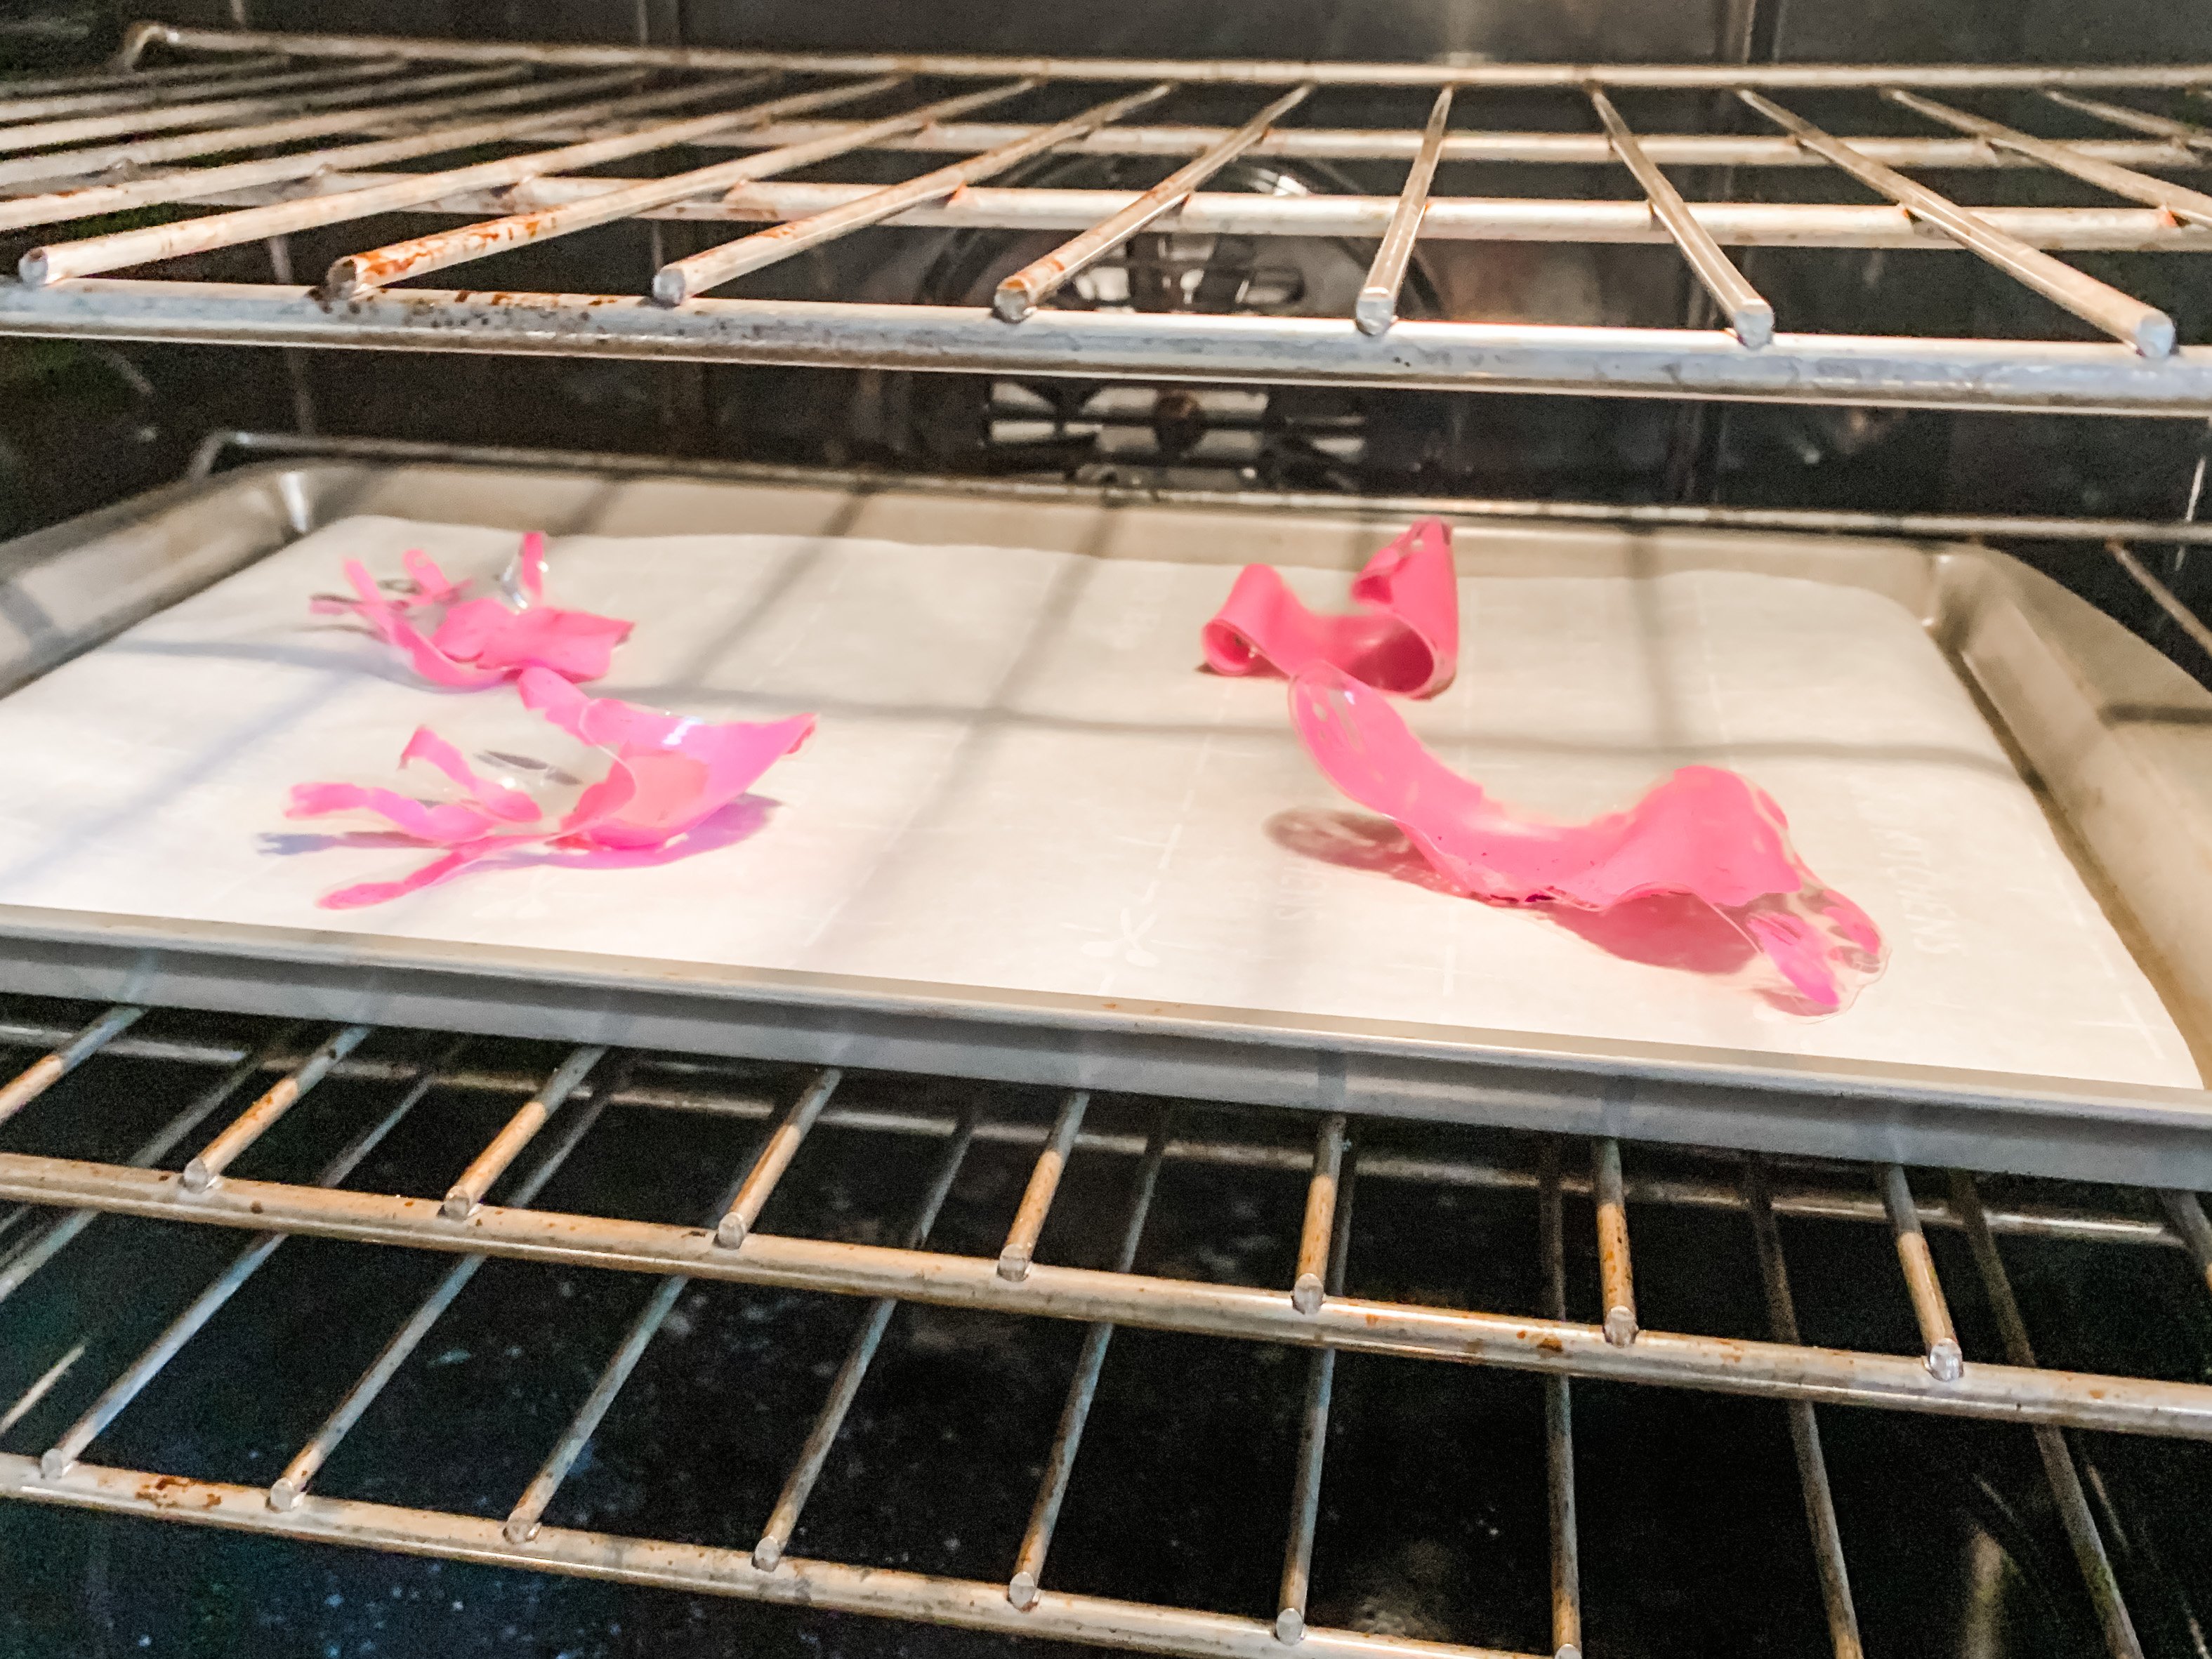
Pre-heat your oven to 325 degrees Fahrenheit. Once the oven is up to temperature, place the baking sheet inside and bake for 2-3 minutes.
Your prints will begin to move like crazy twisting and twirling but don’t worry. After 2-3 minutes they will stop moving and go flat. Keep a close eye because once they go flat they’re done.
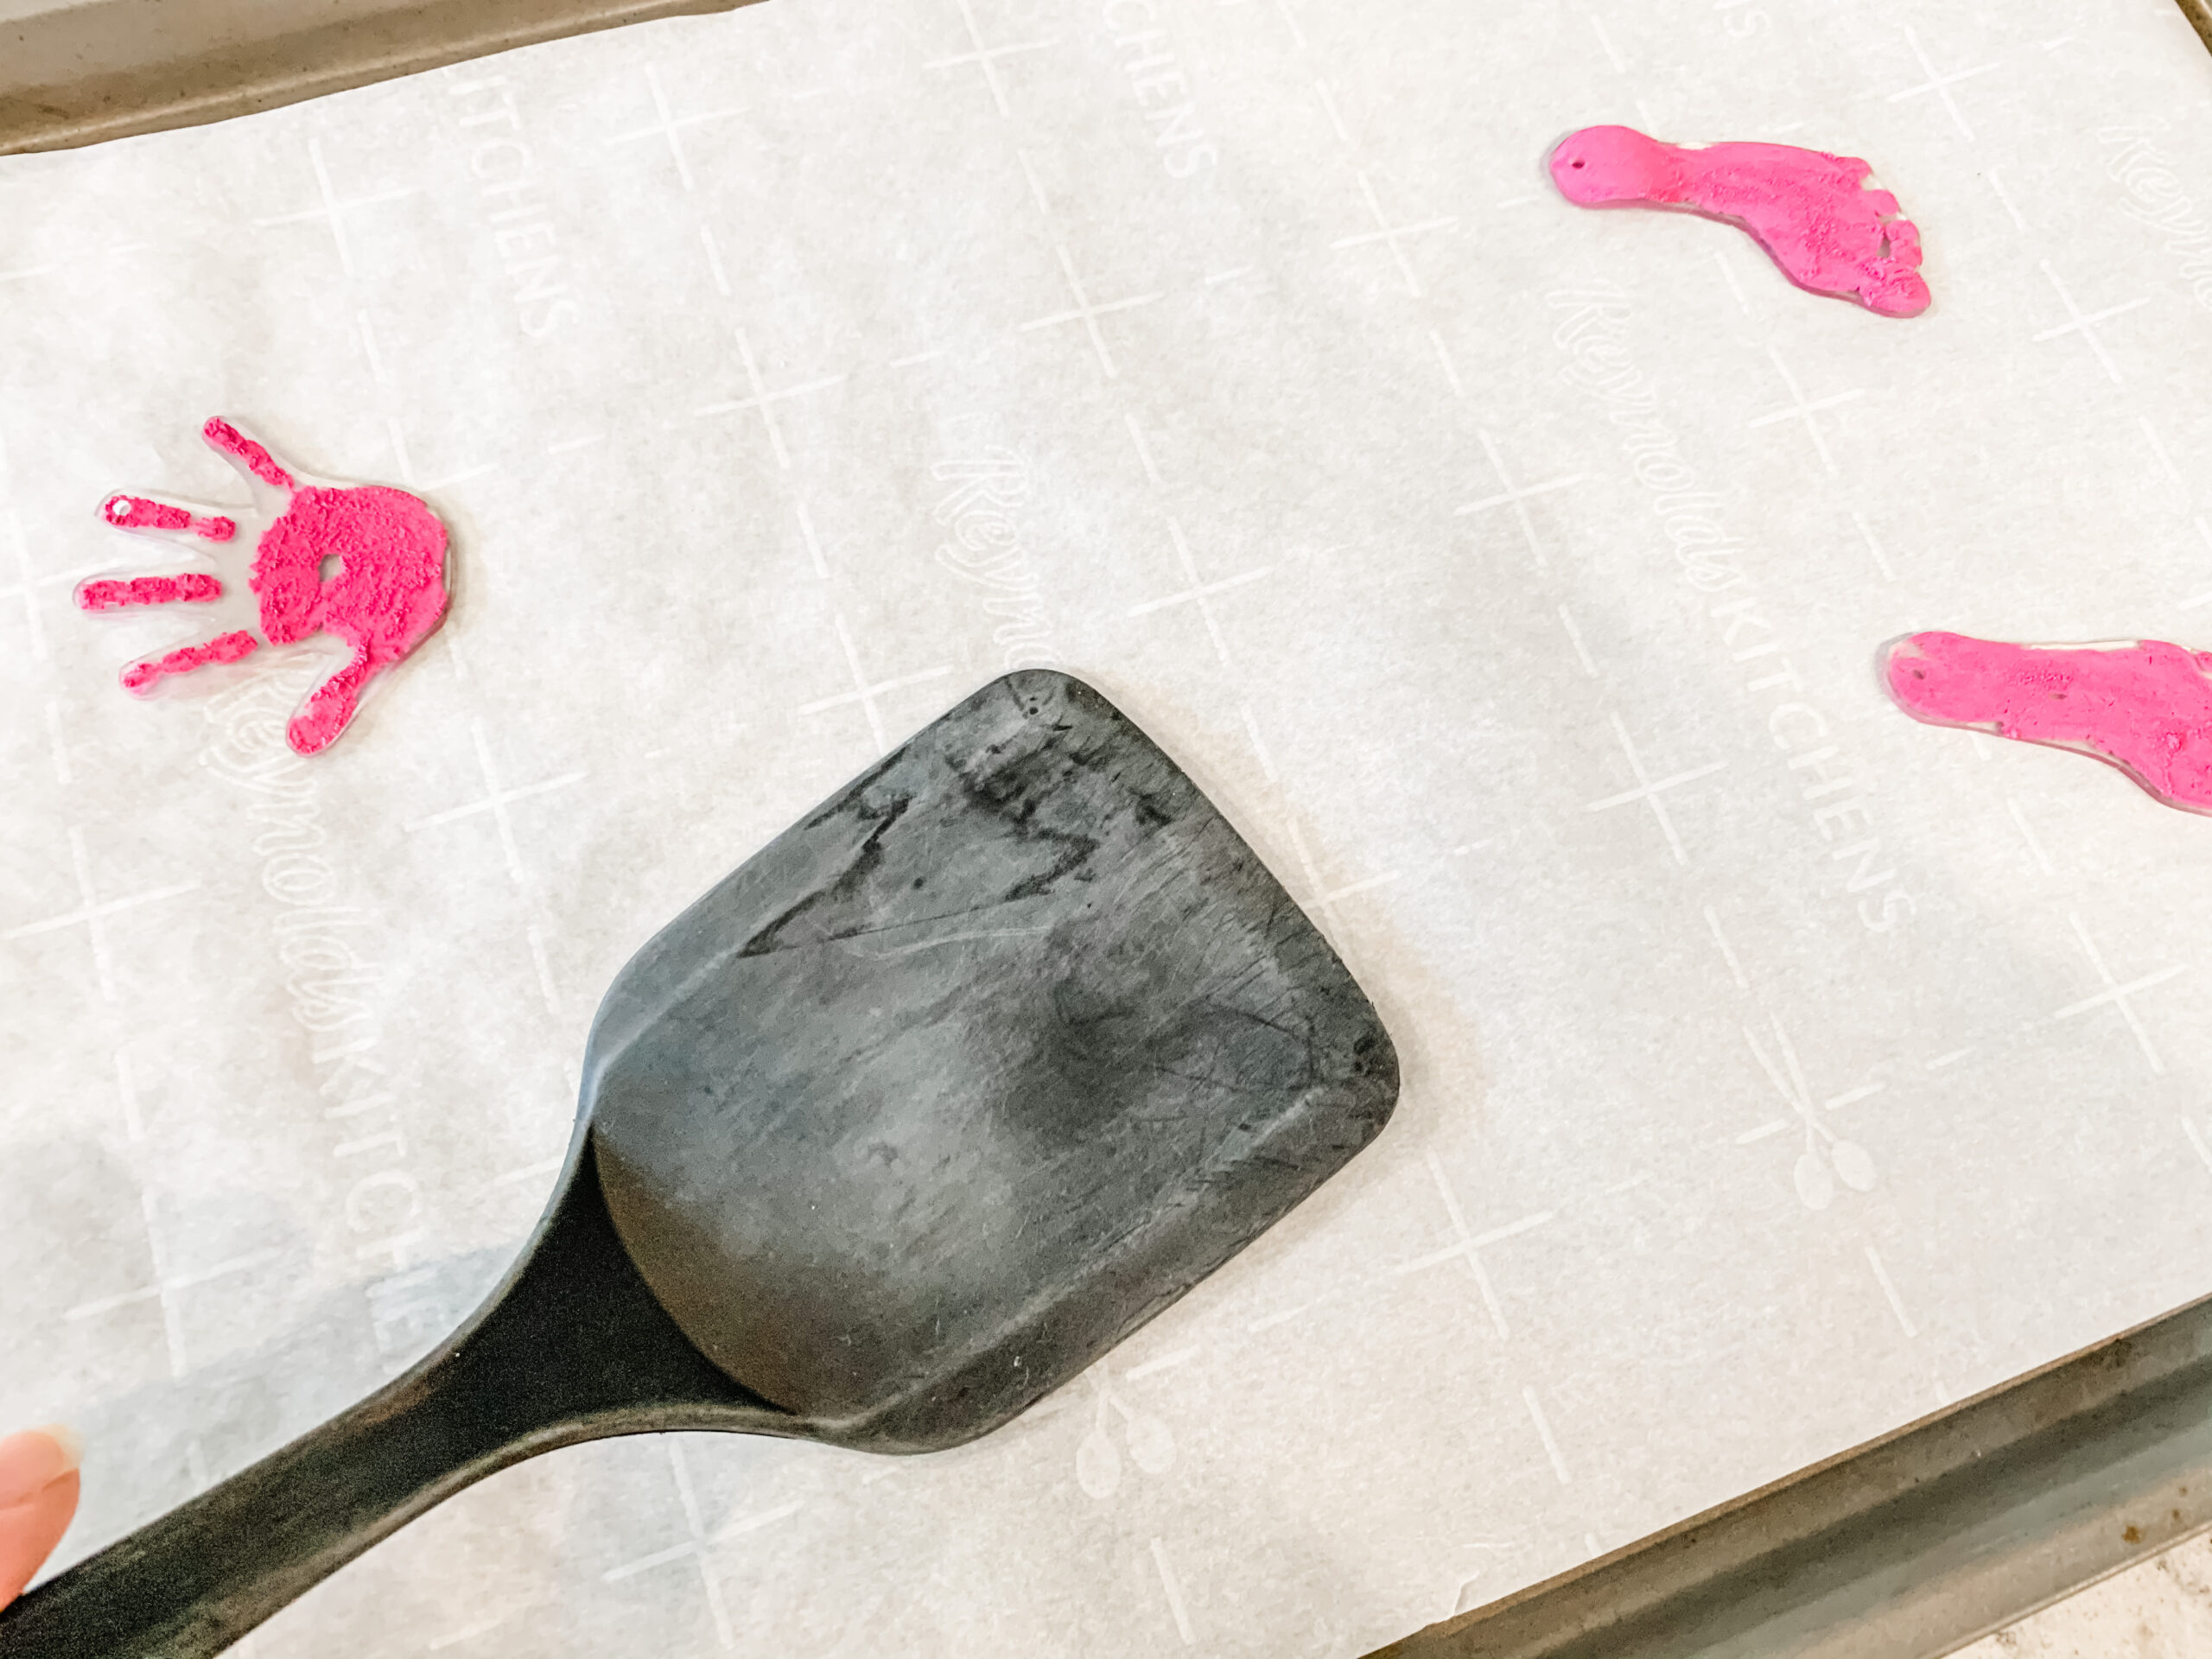
Most of your prints should lay completely flat but you may get a difficult one that is a little wavy. In that case, immediately after taking them out of the oven press down gently with a spatula to flatten.
You need to do this while the plastic is still hot because if it starts to cool and you try to flatten them they could break.
If you have a print that curled too much and got stuck together you might be able to fix them by pulling them apart with two butter knives, but again you’ll have to do this immediately after taking them from the oven.
Step Eight
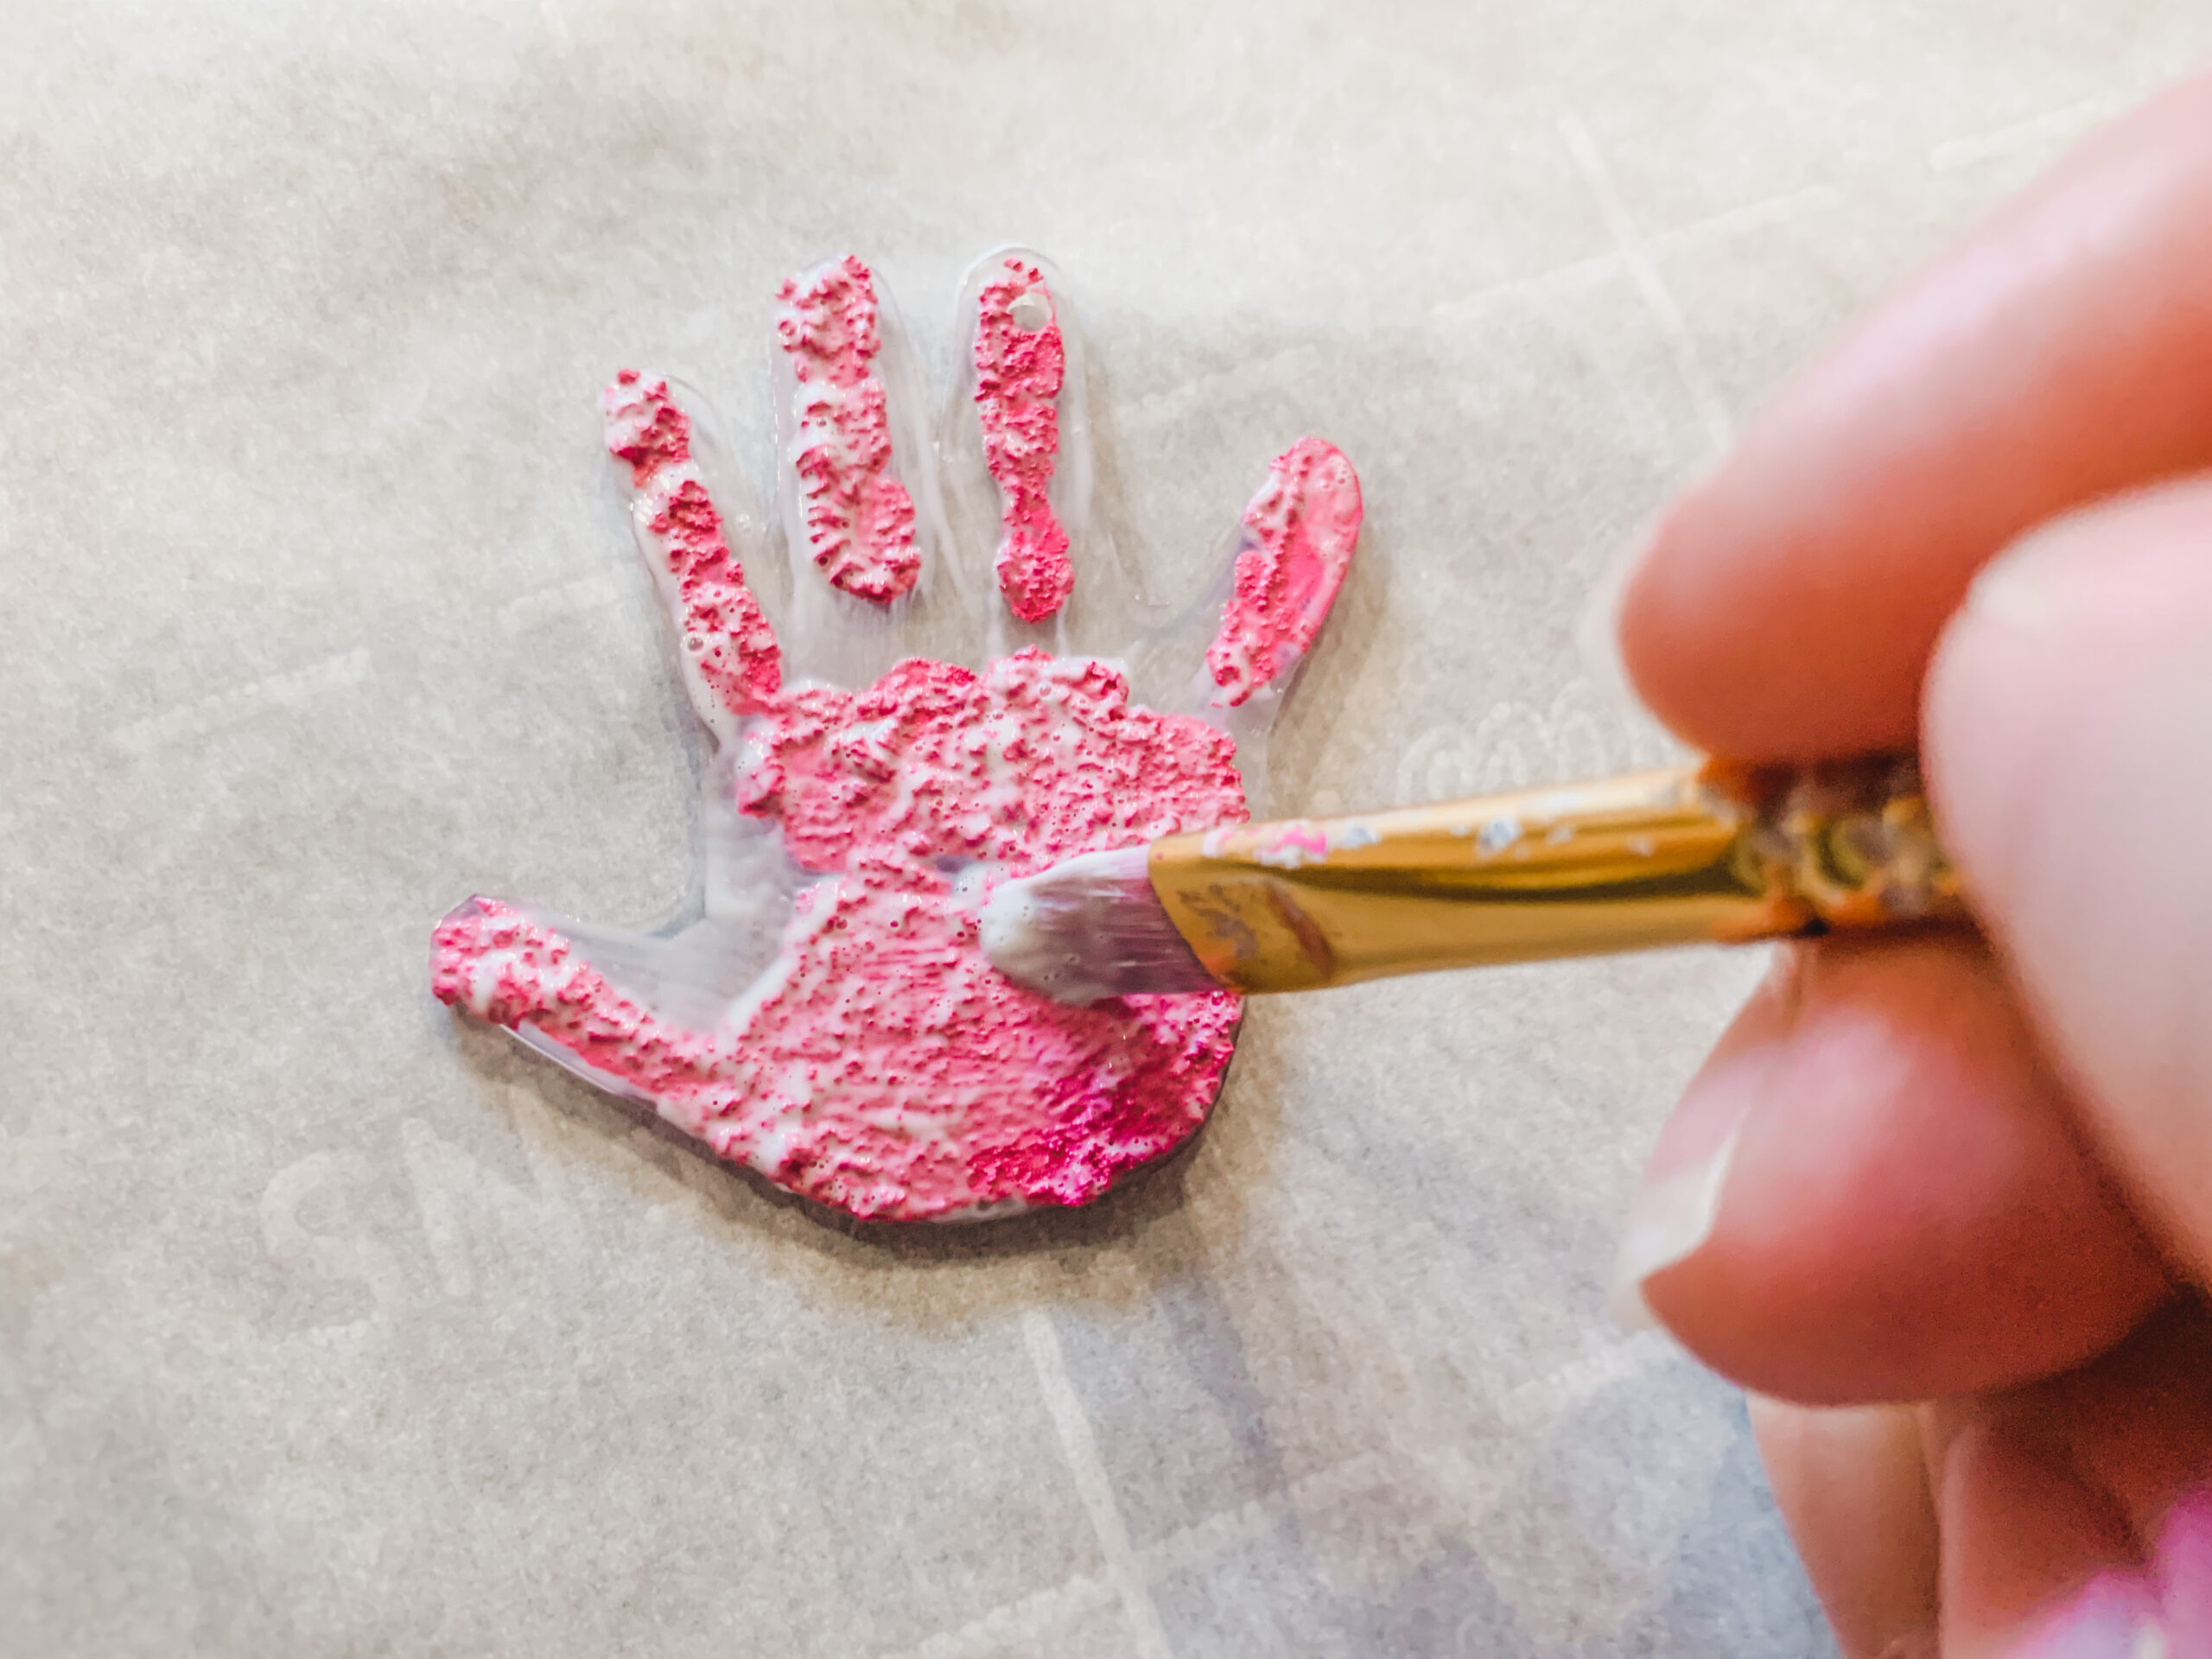
Give your handprint keychains a few minutes to cool and then apply a layer of Mod Podge to protect the paint so it doesn’t scratch off.
I used a gloss finish Mod Podge that dries to a shiny clear finish.
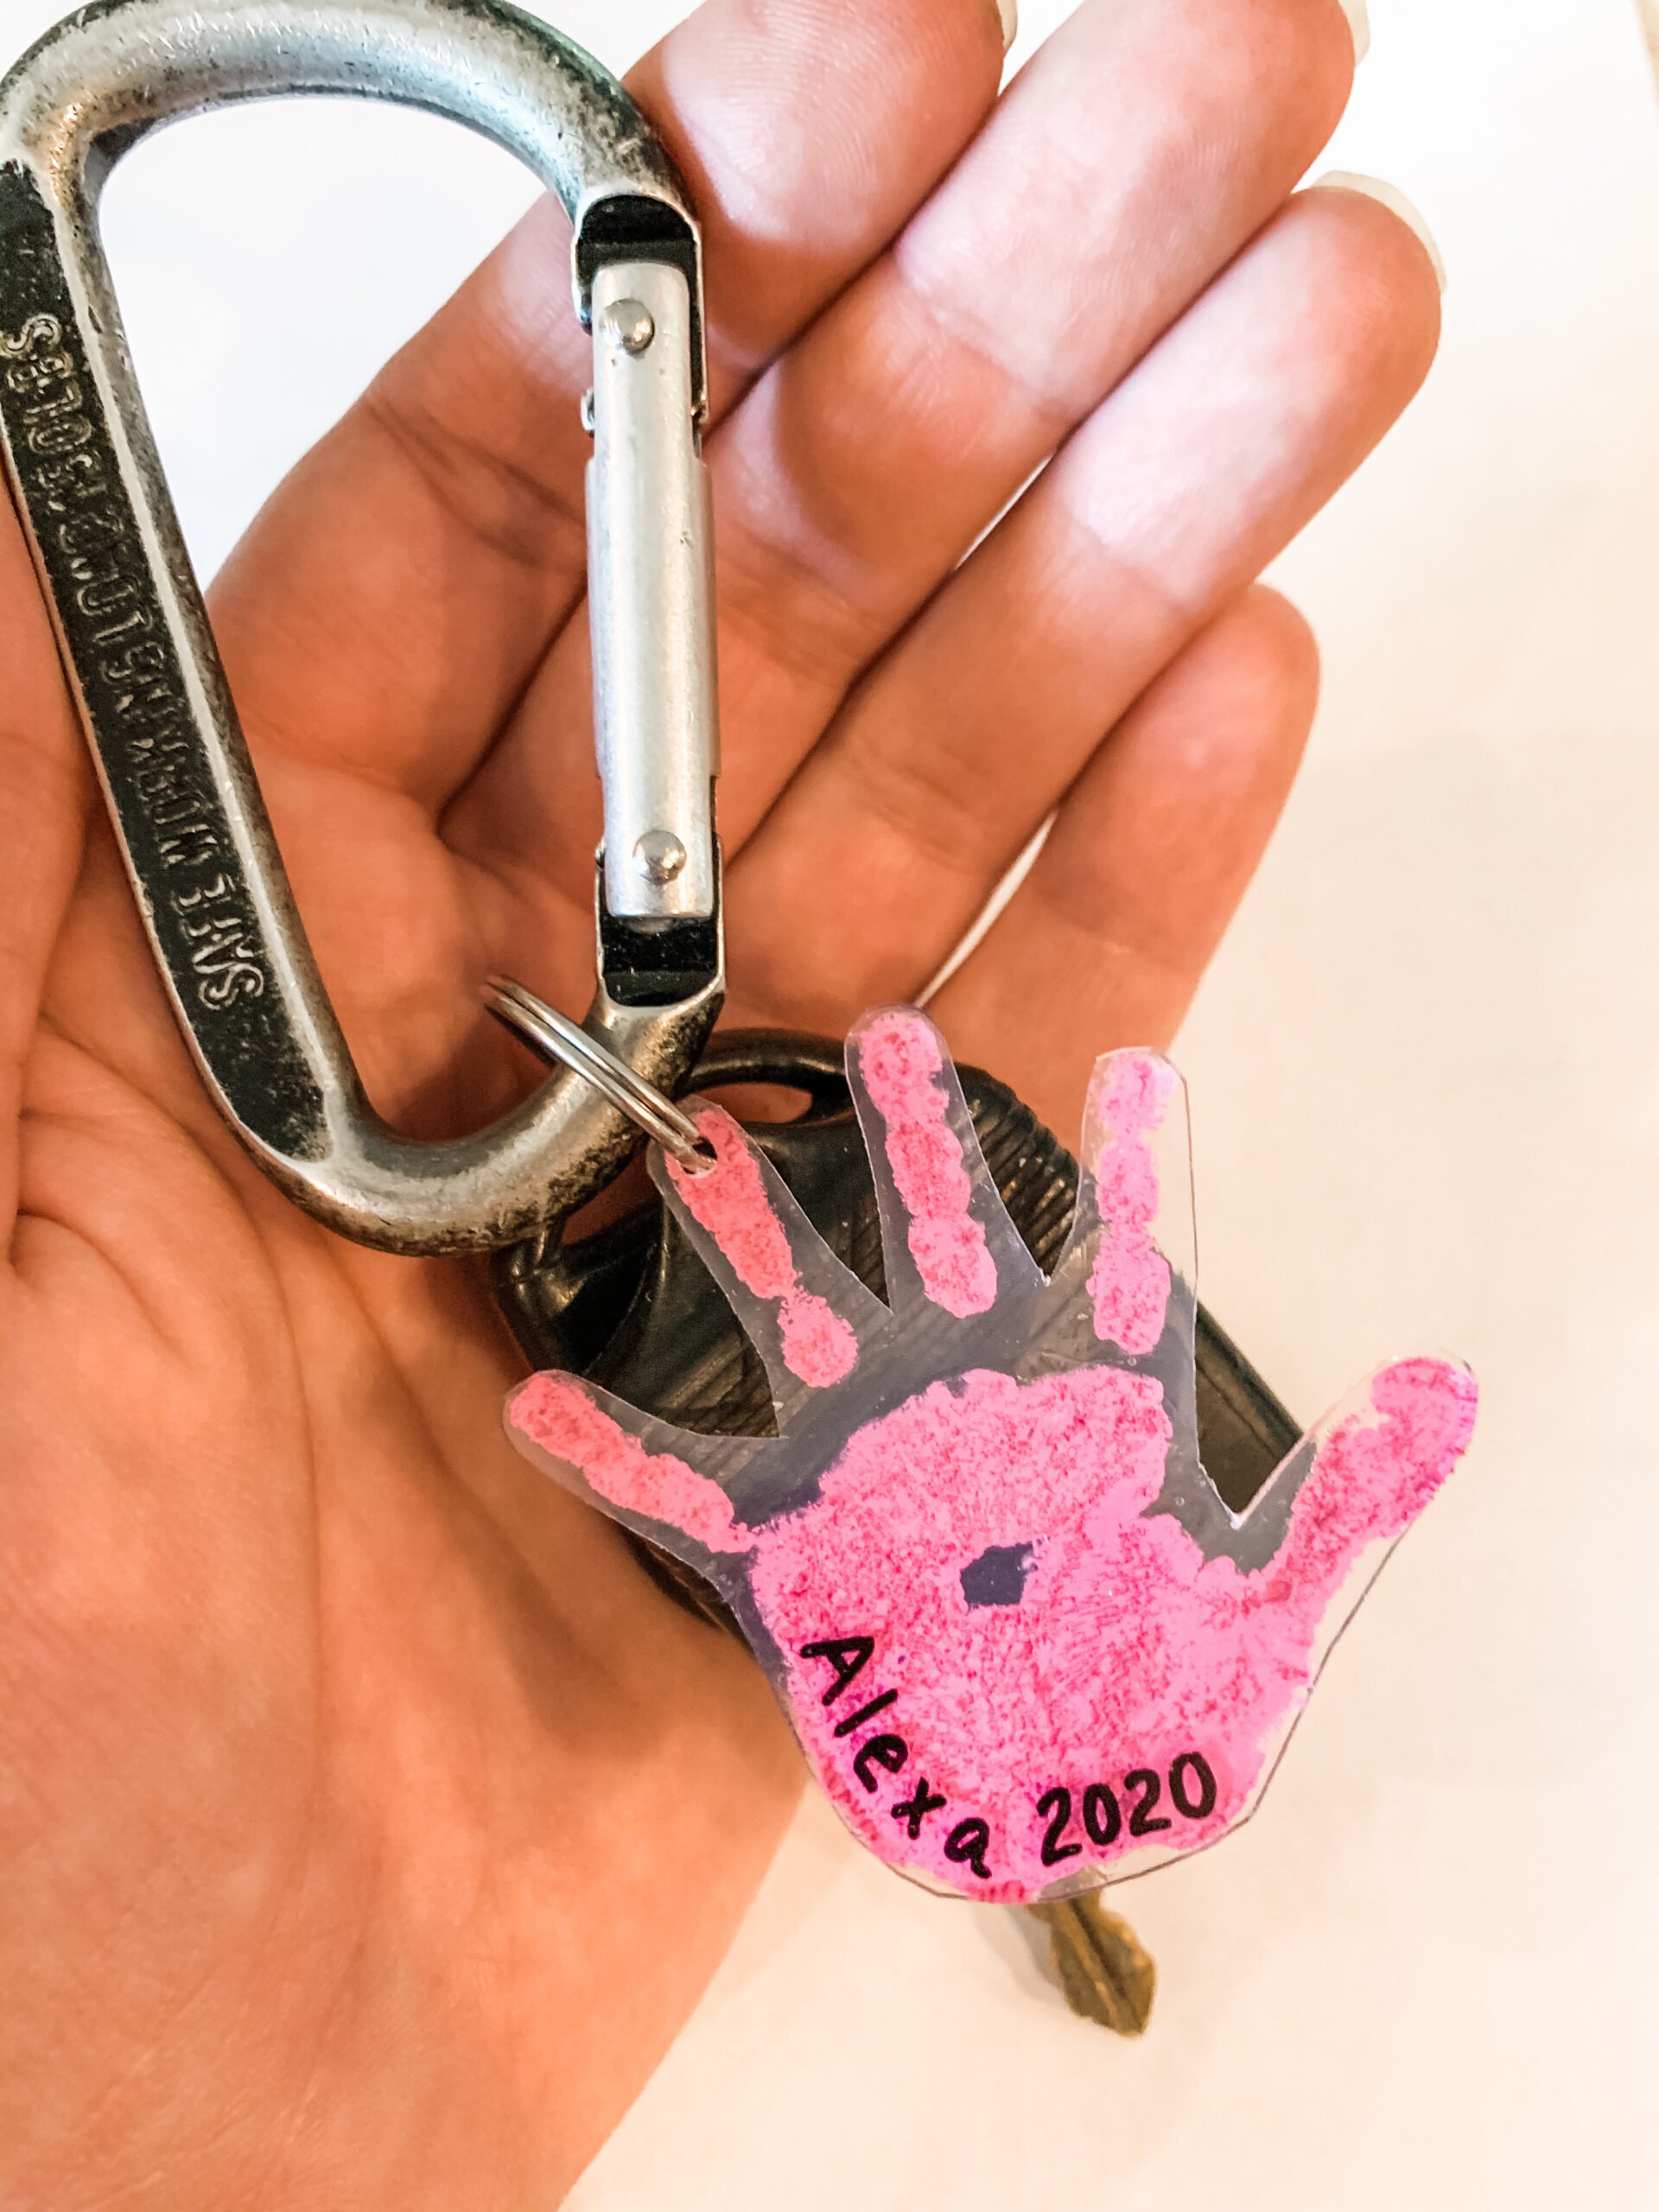
Once your handprint keychain is dry it’s ready for the key ring!
These are so adorable and make great gifts for Father’s Day, Mother’s Day, Christmas presents for family, etc.
You Might Also Like
Easy Toddler Turkey Craft and Activity
Fun Dad Questionnaires For Father’s Day